Configuring the iPP320 PIN Pad in the Mobile App
Once the iPP320 PIN Pad has been connected to the router, powered up, and then configured, it is ready to be configured in the PAYD Pro Plus App. The configuration process is slightly different if configuring a single PIN Pad to a single Apple® iPad®, versus configuring more than one PIN Pad to more than one iPad. Please refer to the appropriate section for instructions.
Configuring a single PIN Pad to a single iPad
Follow the steps below to configure a single PIN Pad with a single Apple iPad.
-
Tap the Settings button ( ).
).
-
On the main menu, tap Configuration.
-
On the Configuration screen, tap Devices.
-
In the Devices screen, under the PIN PAD section on the right pane, toggle the Enable PIN Pad switch to the right (Enabled).
-
Tap Setup.
-
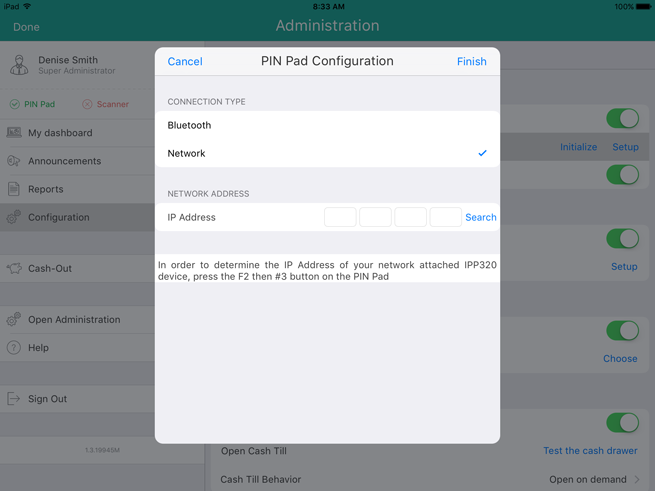
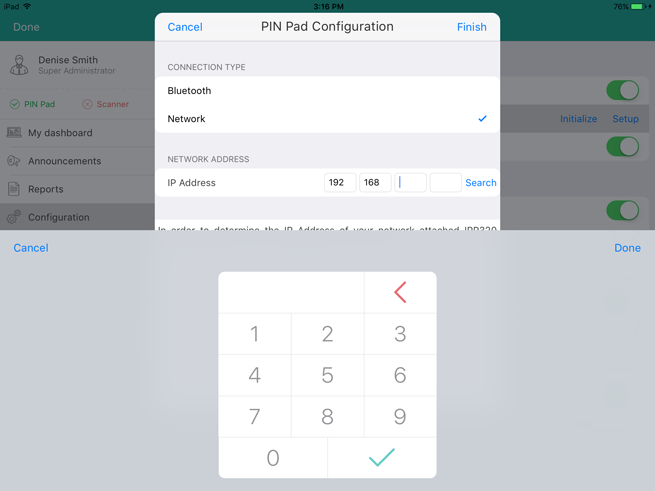
In the PIN Pad Configuration popup, in the CONNECTION TYPE section, select Network.
-
In the NETWORK ADDRESS section, tap Search.
-
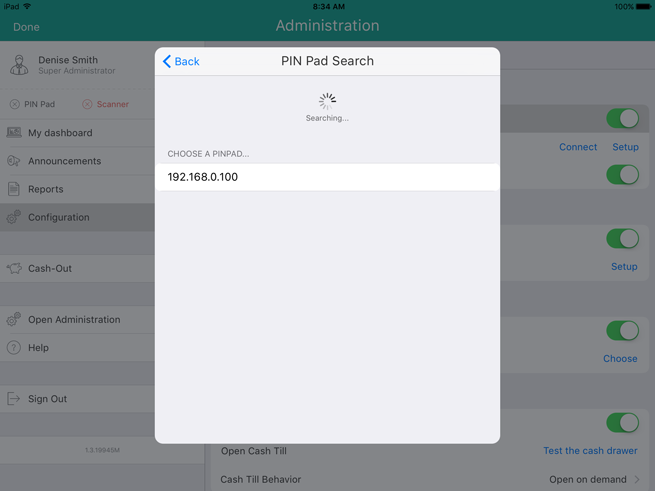
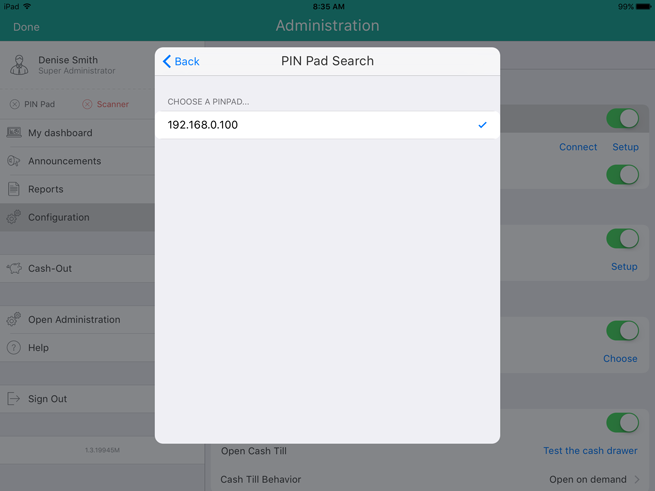
Tap the PIN Pad’s IP address e.g. “192.168.0.100”, then tap <Back at the top of the popup.
-
Tap Finish in the top right corner of the PIN Pad Configuration popup.
-
Do one of the following:
● If you want to enable tips (gratuities) to be collected via the iPP320 PIN Pad, toggle the Enable debit/credit card tipping switch to the right (Enabled).
OR
● If you do not wish to collect tips via the iPP320 PIN Pad, leave the switch alone (not toggled).
-
Initialize the PIN Pad with the Mobile App. Proceed to Initialising the iPP320 PIN Pad in the Mobile App.
Configuring more than one PIN Pad with more than one iPad
Follow the steps below to configure multiple PIN Pads with multiple Apple iPads.
NOTE: One PIN Pad can only be connected to one iPad at a time.
Important: Do not perform this task during normal business hours.
-
Determine the iPP320's IP address:
● At the WELCOME/BONJOUR scree, press the F2 key, then press the F3 key. The IP address displays on the screen.
-
Sign out of the PAYD Pro Plus App on all iPads except for the iPad to which you wish to connect the PIN Pad.
-
Ensure that none of the other PIN Pads are powered on except for the PIN Pad you wish to connect to the iPad.
-
Tap the Settings button ().
-
On the main menu, tap Configuration.
-
On the Configuration screen, tap Devices.
-
In the Devices screen, under the PIN PAD section on the right pane, toggle the Enable PIN Pad switch to the right (Enabled).
-
Tap Setup.
-
In the PIN Pad Configuration popup, in the CONNECTION TYPE section, select Network.
-
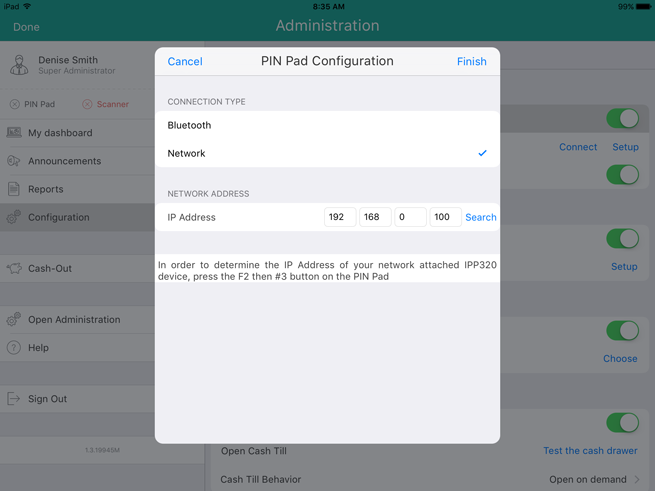
In the NETWORK ADDRESS section, tap inside each of the fields and use the on-screen numberpad to enter a value, using the period as the delimiter for the value that goes into each field. For example, if the IP address is 192.168.12.114, then you would enter '192' in the first field, '168' in the second field, '12' in the third field, and '114' in the fourth field.
-
Tap the checkmark at the bottom of the numberpad (or tap Done).
-
Tap Finish at the top of the PIN Pad Configuration popup.
-
Initialize the PIN Pad with the Mobile App. Proceed to Initialising the iPP320 PIN Pad in the Mobile App.
-
Sign out of the PAYD Pro Plus App on the iPad with which you have just finished working.
-
Log in to the PAYD Pro Plus App on the next iPad with which you wish to configure a PIN Pad.
-
Repeat steps 1 - 15 as needed to configure other PIN Pads with other iPads.