Setting up the Receipt Printer
To set up the receipt printer that will be used by PAYD Pro PlusTM In-Store, follow the instructions below. During setup, you can test the printer as well as select a logo image to be printed on your receipts.
To set up and test the receipt printer:
-
Close out of PAYD Pro Plus on the computer to which you want to connect the printer.
-
Unpack the printer.
-
Follow the printer manufacturer’s instructions to:
-
Install the drivers on the computer to which you want to connect the printer.
-
Connect cables to the printer and connect the printer to the computer.
-
Load the paper roll into the printer.
-
Power on the printer.
-
Install the OPOS drivers in Windows.
-
Open PAYD Pro Plus and launch the POS view.
-
Click the Tools tab.
-
Click the Hardware Setup button.
The POS – Hardware Setup popup appears with the Scanner tab selected by default.
-
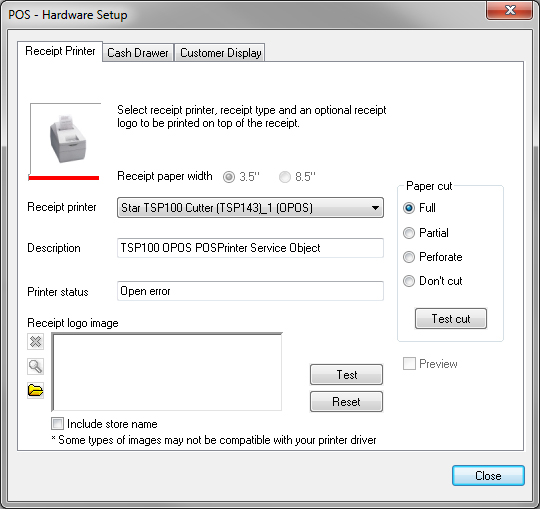
Click the Receipt Printer tab.
-
Click the Receipt Printer drop-down menu and select your receipt printer from the list of installed printers.
NOTE: Your receipt printer may have a different name than the one displayed here.
-
Click the Test button. Your printer will print a sample receipt.
-
Click the Close button at the bottom of the POS – Hardware Setup popup.
-
Repeat steps 1 – 11 to install printers on other POS lanes as needed.
NOTE: For changes to take effect, close down all browser windows and re-start PAYD Pro Plus In-Store POS view.
To select a receipt logo image:
-
In the Receipt Printer tab of the POS - Hardware Setup screen, click the Browse button ( ).
).
The Receipt logo image popup appears.
-
Browse your computer's hard drive to locate the image file you wish to use as your receipt logo.
NOTE: The image file must be stored on your hard drive as a bitmap (.bmp) file.
-
Click the Test button.
A test receipt that includes the logo at the top prints.
-
If you are satisfied with the way the image looks, click Close.
OR
If you wish to select a different image, click the red  button to remove the current image. Repeat steps 1 - 3 again.
Related Topics:
Configuring Merchant Receipt Options
Setting up POS Hardware
Using POS Tools