Follow the instructions below to create a new invoice.
From the PAYD Administration main screen, click Invoicing.
On the Invoicing menu, click New invoice.
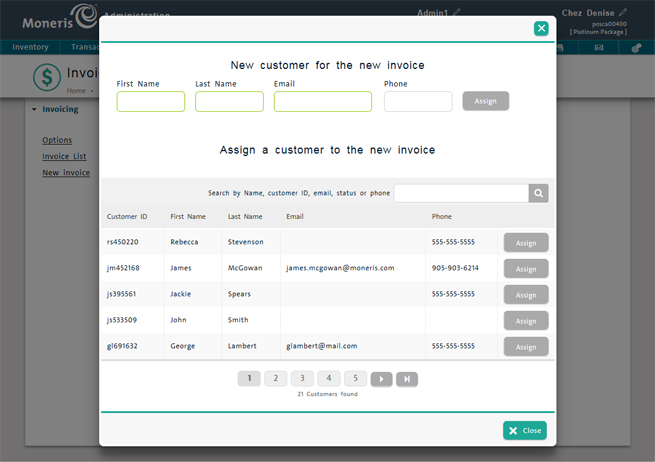
A popup appears prompting for a customer for the invoice.
Choose one of the following:
● If the invoice is for a customer who is not currently registered in your customer database, proceed to step 4.
● If the invoice is for a customer who is stored in your customer database, proceed to step 5.
Add the new customer information as follows:
a. At the top of the popup, click inside the First Name field and enter the customer's first name.
b. Click inside the Last Name field and enter the customer's last name.
c. Click inside the Email field and enter the customer's valid email address.
d. Click inside the Phone field and enter the customer's preferred phone number.
e. Click the Assign button.
The Invoice - Pending screen appears.
f. Proceed to step 6.
In the Assign a customer to the new invoice section, search for the existing customer to whom you wish to assign the invoice. Once you find the customer you wish to assign, click the Assign button beside their name and proceed to step 6.
● Use the Search field to search by customer name, ID, email address, status, or phone number, then click the Search icon (![]() ) when finished.
) when finished.
OR
● Scroll through the list of customers to locate them. Use the navigation buttons at the bottom of the popup to navigate to different pages of search results.
The Invoice - Pending screen appears.

On the Invoice - Pending screen, select the products the customer wishes to buy:
a. Click inside the search field on the left side of the screen and search for a product by its Product ID, Name, Attributes, or Supplier UPC.
b. In the search results that appear below the product search field, click on the product you wish to add.
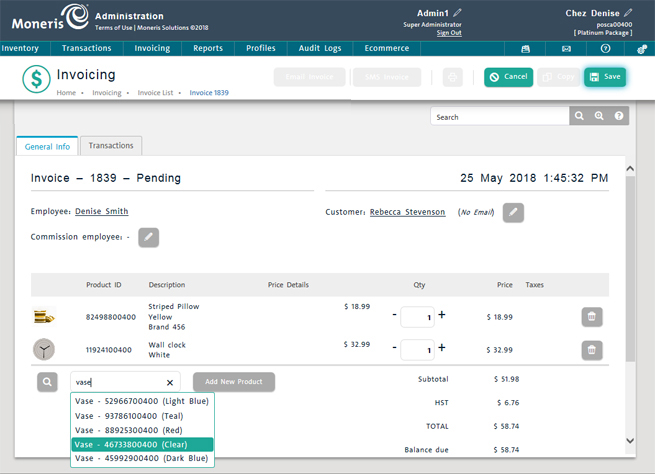
c. Repeat steps a and b as necessary to populate the invoice with products the customer wants to buy.
d. If you wish to make changes to what the customer is buying, or to change other items about the invoice, refer to the Changing Invoice Details section below. If you are satisfied with the invoice as it appears, proceed to step 7.
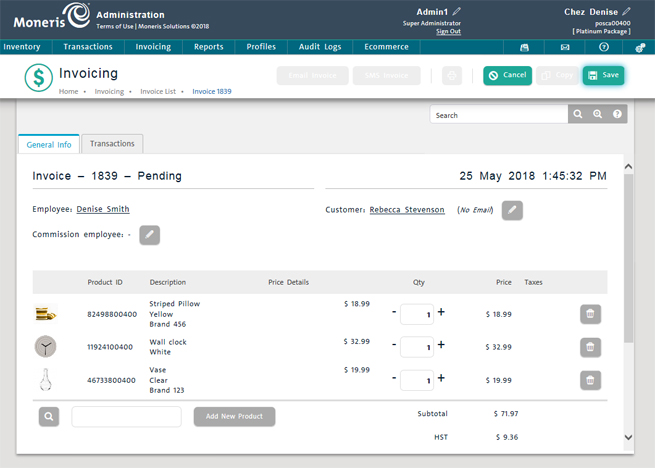
If your employees work on commission, click the pencil icon (![]() ) beside Commission employee and select the employee who will receive commission for the sale. If your employees do not earn commission, skip this step.
) beside Commission employee and select the employee who will receive commission for the sale. If your employees do not earn commission, skip this step.
Click the Save button at the top of the screen to save the invoice.
Scroll down the page to set additional invoice details (if applicable). If no additional details are required, proceed to step 12.
The Scheduling section expands to reveal details for delivery and dates.
Complete the Scheduling section as follows:
a. Select the delivery method using the Delivery method: options:
• If the customer is having their order shipped to them, select the Shipping option.
• If the customer is picking up their products, select the Pickup option.
b. Use the calendar function in the Shipping/Pickup Date: field to set the date the order will be shipped/picked up.
c. If applicable, change the date the invoice balance is due by using the calendar function in the Balance Due Date: field.
NOTE: The balance due date is calculated based on the Default number of days before the payment is due setting defined in the Invoicing - Options screen.
d. If the invoice is not to be sent immediately, you can use the Scheduled Invoice Date: field to schedule a day for the invoice to be sent. By default the field is unpopulated, and therefore the invoice will be sent immediately. Entering a date into this field will delay the invoice send-date until the specified date.
e. Proceed to step 12.
12. If you need to record any special information about the invoice, click the Notes heading and use the text box to enter notes as applicable.
13. Click the Save button at the top of the screen to save the invoice.
14. Select your method of delivering the invoice to the customer:
● To send the invoice as an email:
a. Click the Email Invoice button.
A popup appears prompting to specify or confirm the email address.

b. Confirm the email address with the customer, change it if necessary, then click the Send button.
The Invoice - Pending screen appears.
c. Proceed to step 15.
● To send the invoice as an SMS text:
a. Click the SMS Invoice button.
A popup appears prompting to specify or confirm the phone number.

b. Confirm the phone number with the customer, change it if necessary, then click the Send button.
The Invoice - Pending screen appears.
c. Proceed to step 15.
Close the Invoice - Pending screen by clicking the Invoice List link at the top of the screen.
To print a copy of the invoice, click the Print icon ( ) at the top of the screen. Use the Print dialog box to select the printer, then click the Print button.