There are three methods for adjusting quantities for products on the bill: changing quantity and scanning, manually keying in a quantity, and using the quantity buttons. Each method is equally effective, so pick the method that works best for you.
If you have a barcode scanner installed, or are manually keying in product UPCs to add them to the bill, you can use the Quantity field to the left of the data entry field before scanning/keying in.
![]()
Click inside the Quantity field (by default, the quantity is 1) and key in a new quantity. For example, if the customer is buying 5 of one particular item, you can key in the number "5" into the Quantity field, then scan one of the product's barcodes.
Once products have been added to the bill, it is possible to change their quantity manually.
On the line containing the product, click the quantity (by default, the quantity is 1). A flashing cursor appears. You are able to erase the number 1 and replace it with a new quantity. For example, if the customer is buying 5 of one particular item, you can key in the number "5" into the field.
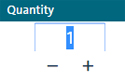
Once products have been added to the bill, it is possible to change their quantity by using the + and - buttons.
On the line containing the product, click the + button to increase the quantity (by default, the quantity is 1), or click the - button if you added too many. For example, if the customer is buying 5 of one particular item, you click the + button 4 additional times to increment the quantity to 5.
Adding a Sales Item by Searching Inventory