Customizing the Label Layout
PAYD Pro Plus comes pre-installed with 5 label layouts for you to use based on common label sizes and elements. However, you may need to customize the layout, or define your own layout if you use different label types or elements (see Changing PAYD Pro Plus Default Label Layouts below for more information). Use the DYMO Label software (installed on your computer when you installed the Dymo LabelWriter's drivers) to define the label layout you will use for your product barcodes.
NOTE: You will need to download the Moneris' default label layout in order to edit it within the DYMO Label software.
-
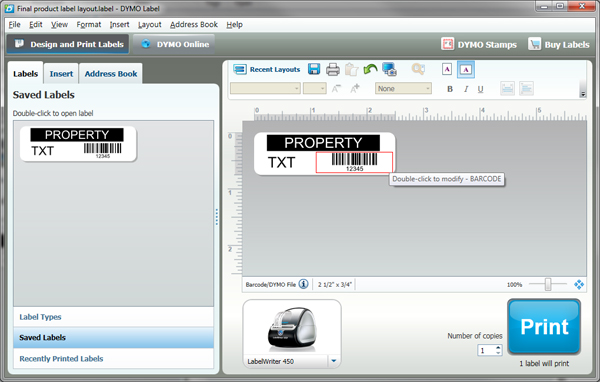
On your computer's desktop, double-click the DYMO Label icon ( ).
).
-
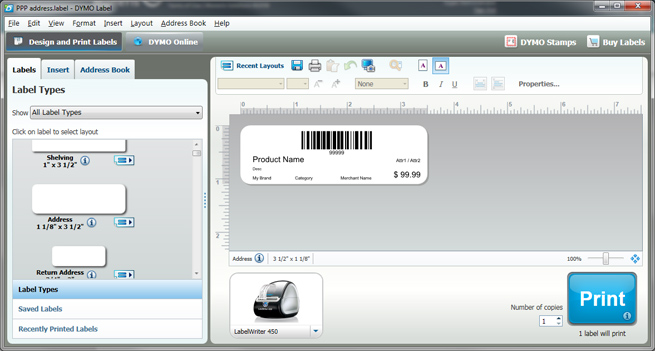
In the DYMO Label screen, click the File menu, and choose Open.
-
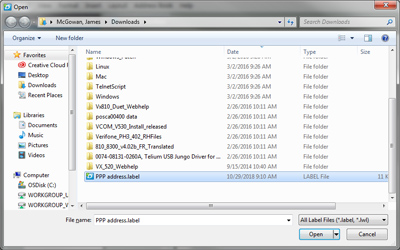
In the Open dialog box, navigate to the folder where you downloaded the Moneris default label layout.
-
Click on the label file (with the .label file extension) and then click Open.
-
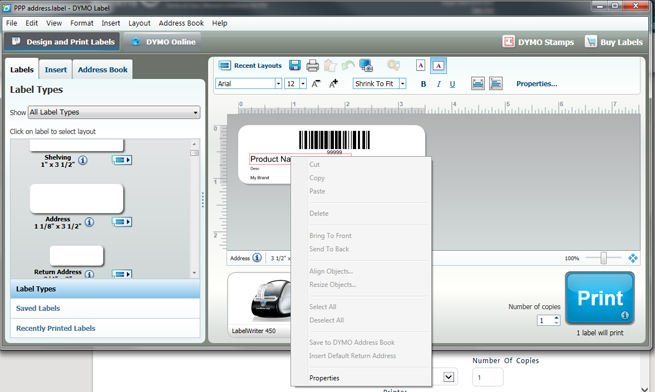
On the right design pane, right-click an element of the label e.g. right-click on "Product Name" and scroll down the menu and click on Properties.
-
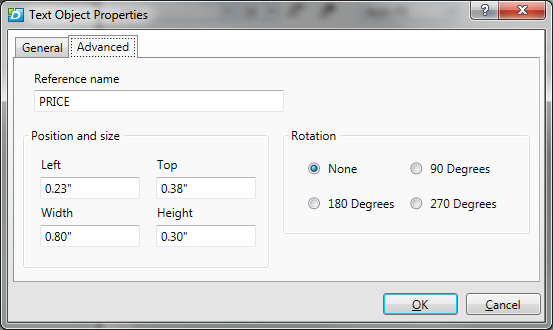
At the top of the popup, click the Advanced tab.
-
Use the Position and size fields to position the element on the label. For example, if you want to position something closer to the left edge of the label, place a lower value in the Left field; if you want an element to be closer to the middle of the label, place a higher value in the Top field. It is also possible to rotate an element by using the Rotation radio buttons.
-
When finished changing elements, click the OK button.
-
Optional: You can change the font and size of the element by making changes at the top of the right design pane.
-
Repeat steps 5 - 9 to add and adjust other elements to the label as needed.
-
Click the Save icon ( ) at the top of the right pane.
-
In the Save As dialog box, enter a name for the label layout and click Save.
-
Select the label layout in PAYD Administration.
Adding Label Elements
If you are using a blank label, it is possible within the DYMO software to add label elements to create your own layout. Follow the steps below to add label elements.
-
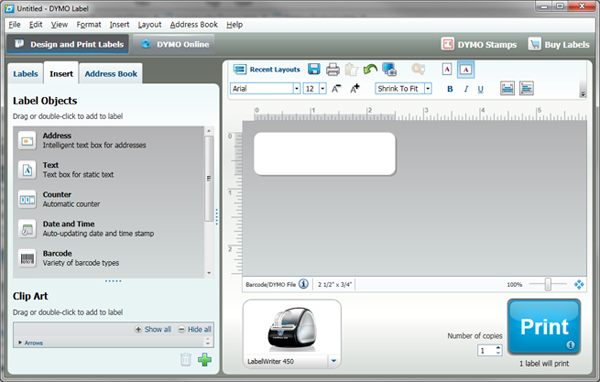
On your computer's desktop, double-click the DYMO Label icon ().
-
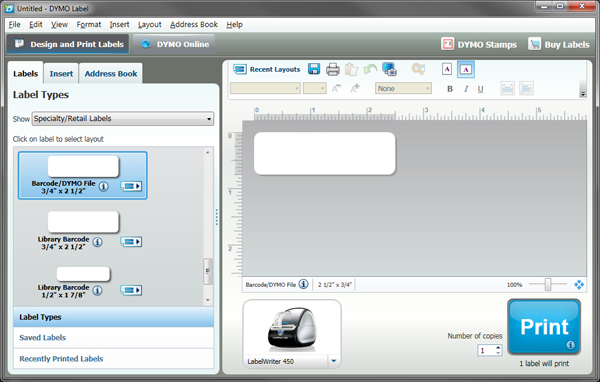
In the DYMO Label screen, click the Labels tab.
-
Click the Show drop-down menu and select Specialty/Retail Labels.
-
Scroll down the list of label layouts on the left side of the screen, and click the type of label you purchased.
-
Click on the Insert tab.
-
Drag and drop an item from the Label Objects section on the left.
-
Position the item on the label.
-
On the right design pane, right-click on the element of the label that you just dropped, scroll down the menu, and click on Properties.
-
At the top of the popup, click the Advanced tab.
-
Click inside the Reference Name field and enter one of the following label merge codes:
NOTE: A "merge code" is a term used to described a special word that pulls in variable data e.g. the merge code NAME will be used to display the product's name.
● NAME - use this merge code to incorporate the product's name on the product label
● DESC - use this merge code to incorporate the product's description on the product label
● ATTRIBUTES - use this merge code to incorporate the product's attributes on the product label
● BARCODE - use this merge code to incorporate the product's barcode (product ID) on the product label.
● MERCHANT - use this merge code to incorporate your business name on the product label
● BRAND - use this merge code to incorporate the product's brand name on the product label
● CATEGORY - use this merge code to incorporate the product's category name on the product label
● PRICE - use this merge code to display the price on the product label. In PAYD Administration, use the Retail Price or Sale Price options to indicate what price you wish to display.
-
Use the Position and size fields to position the element on the label. For example, if you want to position something closer to the left edge of the label, place a lower value in the Left field; if you want an element to be closer to the middle of the label, place a higher value in the Top field.
-
Repeat steps 6 - 11 to add and adjust other elements to the label as needed.
-
Click the Save icon () at the top of the right pane.
-
In the Save As dialog box, enter a name for the label layout and click Save.
-
Select the label layout in PAYD Administration.
Related Topics
Installing the Dymo LabelWriter
Selecting the Dymo Labels
Using the Dymo LabelWriter