Use the Permission Roles screen to add a new permission role to PAYD Pro PlusTM. Once you add a new permission role, you can assign employees to it. To add a new role, first create the new role and then set its permissions for PAYD Pro Plus In-Store POS view (POS) and PAYD Administration (Backend) functions.
NOTE: Before adding a new permission role, see Notes on Permission Roles.
NOTE: Permission roles also extend to user permissions for the PAYD Pro Plus Mobile App, however there is no functionality within the Mobile App to administer permission roles.
On the Administration main screen, click Profiles.
On the Profiles menu, under the Employees section, click Permission Roles.
At the top of the screen, click the Add button.
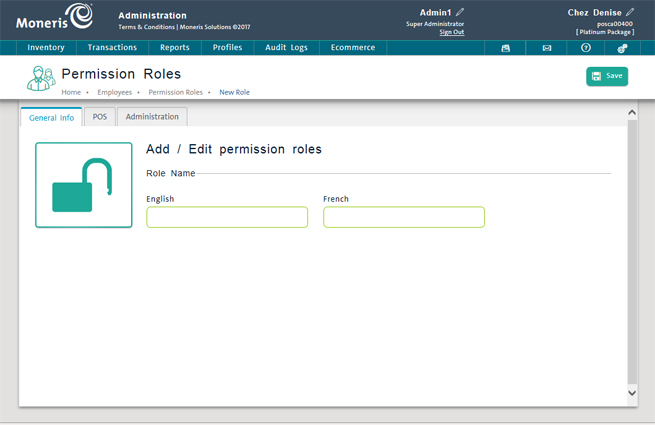
The Add/Edit permission roles screen appears with the General Info tab selected.
Enter an English name for the new permission role (e.g., Supervisor). A French name is optional.
Click the Save button.
Set the role's permissions.
Click the POS tab.
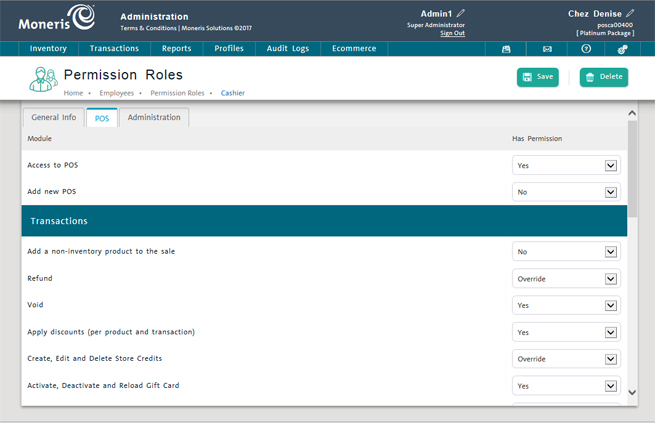
To give the new role access to PAYD Pro Plus In-Store POS view , select Yes from the Has Permission drop-down list for the Access to POS permission.
The remaining permissions are enabled.
Set the individual permissions under each function grouping for Transactions, Mobile, Customers, and Tools by selecting Yes, No or Override from the corresponding Has Permission drop-down list using the following guidelines:
Yes - The permission is granted.
No - The permission is denied.
Override - Requires override by a user with appropriate permissions. This option does not appear for all permission types.
Click the Save button.
Click the Administration tab.
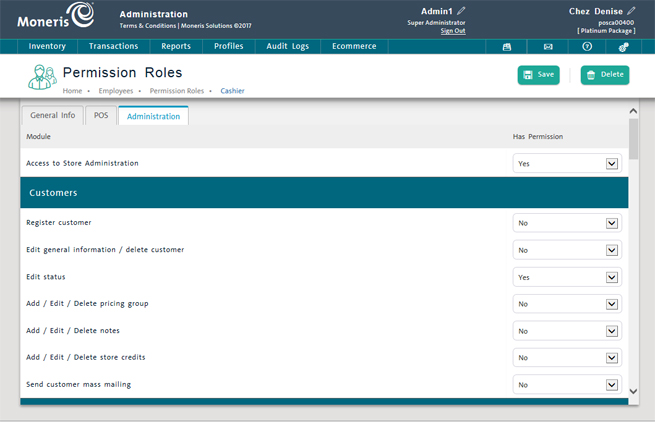
To give the new role access to PAYD Administration , select Yes from the Has Permission drop-down list for the Access to Store Administration permission.
The remaining permissions are enabled.
Set the individual permissions under each function grouping (i.e. Customers, Orders etc.) by selecting Yes, No or Override from the corresponding Has Permission drop-down list using the following guidelines:
Yes - The permission is granted.
No - The permission is denied.
Click the Save button.
Click the Profiles menu, and under the Employees section, click Permission Roles.