Connecting the Receipt Printer to the App
Once the Bluetooth receipt printer has been paired to your Apple iPad, it needs to be connected in the PAYD Pro Plus Mobile App. Follow the directions below to connect the printer to the app.
-
Ensure the printer is powered on and paired to the Apple® iPad.
-
Login to the PAYD Pro Plus App.
-
Tap the Settings button ( ).
).
-
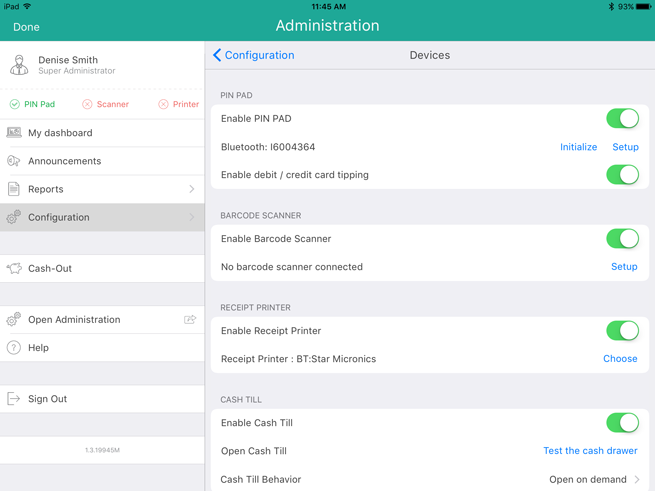
On the main menu, tap Configuration.
-
In the Configuration screen, tap Devices.
-
On the right pane, under the RECEIPT PRINTER section, toggle the Enable Receipt Printer switch to the right to enable it.
-
Tap Choose.
-
-
Tap the name of your Bluetooth receipt printer in the list. The popup closes and the status changes from “Not connected” to display the printer name e.g., “BT: Star Micronics”.
NOTE: If you have multiple receipt printers from which to choose, select the receipt printer that is closest to you for the best results.
-
-
Tap <Configuration at the top of the right pane to save your work.
The receipt printer is ready to work with the PAYD Pro Plus App.
Related Topics
Pairing the Receipt Printer
Configuring Devices in the Mobile App
Hardware Status Indicators