Moneris® offers the option of running PAYD Pro PlusTM In-Store in a multi-lane environment. PAYD Pro Plus multi-lane is still set up in a single retail location and still uses a single PAYD Administration component for administering your system. What's different about multi-lane is that it allows you to run PAYD Pro Plus In-Store on several PCs instead of just one so that you can have an environment in your store consisting of multiple POSs (or "lanes") instead of just one.
In a multi-lane environment, a POS is created and assigned to each of your PAYD Pro Plus PCs., and each POS has its own name (e.g., Front1, Front2) and PINpad use indicator. You will need to start by choosing and naming your existing POS/lane. Then for every new PC you add to your environment, you will need to add and name a new POS/lane for it. At any time, you can reassign a PC to a POS/lane.
NOTE: The ability to add a new PC/POS lane to your environment depends on your Merchant Agreement with Moneris. If you want to add more POSs to your environment, please contact the Support Team.
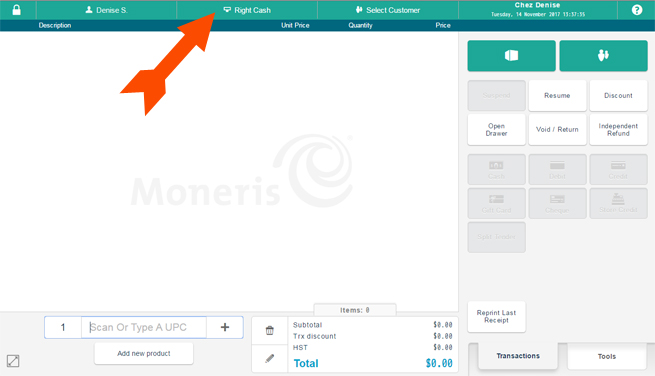
When operating PAYD Pro Plus In-Store in a multi-lane environment, the POS interface is exactly the same as in single-lane with one exception. In addition to displaying the User ID of the employee who is logged on, the POS header displays the name of the POS (lane) currently in use.
Before you can add new POSs/lanes to your environment, you will need to choose and name your existing POS/lane.
Choose which PC you would like to assign to the existing POS/lane.
Log in to PAYD Pro Plus on that PC. You must log in as the PAYD Pro Plus account administrator.
The New POS Detected screen appears.
Enter a Name for the POS without any spaces (e.g., Front1). The default is the computer name.
In the Add or Reassign drop-down menu, select the Add as a new POS option.
If the POS will be using a PINpad to process integrated payments, click the Use a Pinpad checkbox.
NOTE: This feature will only be visible to Integrated merchants.
If the POS will be using the onscreen keyboard, click the Use Onscreen Keyboard checkbox. See Using the Virtual Keyboard for more help.
If the POS will be using the Checkout button, click the Use 'Checkout' button checkbox. See Using the Checkout Button for more help.
Enter the PAYD Pro Plus account administrator Username and Password.
Click OK.
The POS Cash-in screen appears.
Cash in to the POS (see Cashing In).
The first time you log in to PAYD Pro Plus In-Store POS view on a new PC, the New POS Detected popup appears, prompting you for information to set up a new POS/lane for the PC.
Log in to PAYD Pro Plus In-Store POS view on the new PC. You must log in as the PAYD Pro Plus account administrator.
The New POS Detected popup appears.
Enter a Name for the new POS without any spaces (e.g., Front1). The default is the computer name.
In the Add or Reassign drop-down menu, select the Add as a new POS option.
If the POS will be using a PINpad to process integrated payments, click the Use a Pinpad checkbox.
NOTE: This feature will only be visible to Integrated merchants.
If the POS will be using the onscreen keyboard, click the Use Onscreen Keyboard checkbox.
If the POS will be using the Checkout button, click the Use 'Checkout' button checkbox.
Enter the account administrator Username and Password.
Click OK.
The POS Cash-in screen appears.
Cash in to the new POS (see Cashing In).
At some point in operating PAYD Pro Plus In-Store in multi-lane environment, it may be necessary to reassign one of your PCs to a different POS. Before you can do the reassignment, you must configure the POS for reassignment through PAYD Administration. Once you have configured the POS, you can reassign the PC to it through the POS view.
EXAMPLE: You have three PCs assigned to the following POSs: Front1, Front2 and Front3. Currently, PC1 is assigned to Front1, PC2 is assigned to Front2 and PC3 is assigned to Front3. The PC assigned to Front2 needs upgrading and will not be operating for a few days, so you want to reassign PC3 (currently assigned to Front3) to Front2. In order to do this, you must first configure Front2 for reassignment.
Log in to PAYD Administration from any PC. You must log in as the PAYD Pro Plus account administrator.
On the PAYD Administration main screen, click the Configuration icon ( ).
).
On the Configuration menu, click Lanes.

In the list of Lanes/POSs, find the Lane to which you want to reassign the PC (in the example, Front2).
Place a checkmark in the lane's Reassign Lane checkbox.
Click the Save button at the top of the screen.
The Reassign Lane checkbox for the POS changes to a Set to be reassigned message.
Log out of PAYD Administration.
Log in to the POS View on the new laptop or PC you want to reassign to the POS (in the example, PC3). You must log in as the PAYD Pro Plus account administrator.
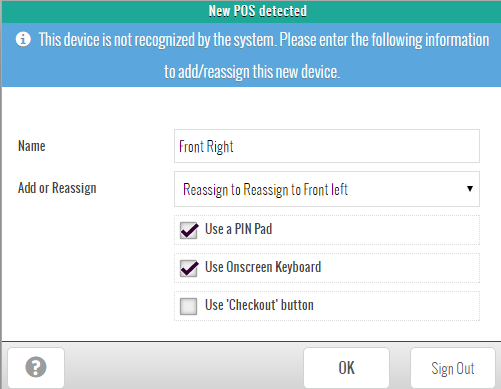
The New POS Detected popup appears.
From the Add or Reassign drop-down list, select Reassign to <POS name> (in the example, Reassign to Front2).
Enter the Name of the new POS (in the example, Front2).
NOTE: If you enter a name other than the existing POS name, you will effectively re-name the POS.
If the POS uses a PIN Pad to process integrated payments, make sure the Use a PIN Pad checkbox is selected.
NOTE: This feature will only be visible to Integrated merchants.
If the POS will be using the onscreen keyboard, click the Use Onscreen Keyboard checkbox.
If the POS will be using the Checkout button, click the Use 'Checkout' button checkbox.
Click OK.
The POS View appears displaying the name of the POS on the header next to the Employee ID.
To manage your POS lanes, see Configuring POS Lanes.