Click the  button in the top right corner of the Inventory Transfers screen.
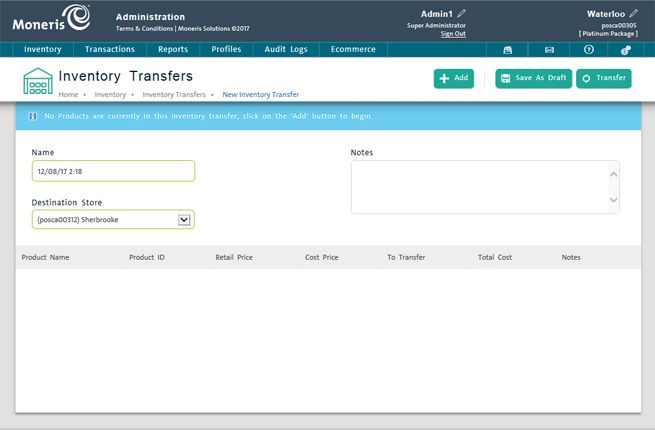
The Inventory Transfers screen appears.
Use the Inventory Transfers screen to create an outgoing inventory transfer. This will enable your store location to send stock to another store location.
On the PAYD Administration main screen, click Inventory.
On the Inventory menu, under the Inventory section, click Inventory Transfer.
The screen displays a list of incoming and outgoing inventory transfers on your PAYD Pro PlusTM system.
Click the  button in the top right corner of the Inventory Transfers screen.
The Inventory Transfers screen appears.
Accept the default name the system gives to the transfer in the Name field, or erase the default and enter your own name for the transfer.
Click the Destination Store drop-down menu and select the store that will receive the stock you are sending.
If applicable, enter any notes about the transfer into the Notes field or leave it blank.

Click the Add button at the top of the screen.
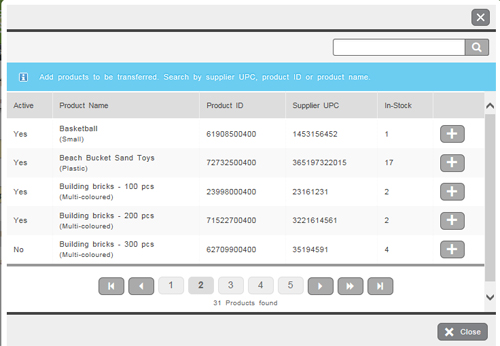
A popup appears.
Enter the supplier's UPC, product ID or product name into the search field and click the Search icon (![]() ).
).
HINT: To search all items in a list, leave the field blank and click the Search icon (![]() ).
).
Click the Add icon (![]() ) beside the product.
) beside the product.
Repeat steps 6 and 7 as necessary to populate the transfer with items being sent to the other store.

When finished, click the Close button at the bottom of the popup.
The New Inventory Transfer screen reappears and is populated by the selected items.

Click the Add button at the top of the screen.
Repeat steps 6 - 9 in the instructions listed above.
Click inside the To Transfer column and enter a new number.
NOTE: The default quantity to transfer is 1. The number entered must be higher than 0 and cannot be a negative number (e.g. -5).
Click inside the applicable Notes field beside the item and enter a note (a maximum of 12 alphanumeric characters) as needed.
Click the Save As Draft button at the top of the screen.
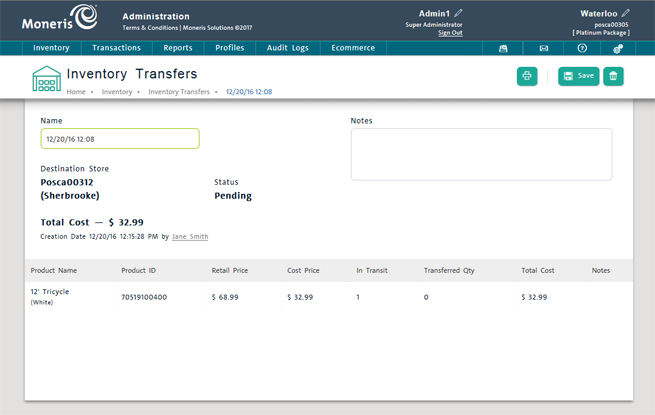
NOTE: Saving the transfer as a draft enables you to come back to it at a later point and edit the contents before sending the transfer.
Click the Remove icon (![]() ) beside the item in the list.
) beside the item in the list.
Click the Transfer button.
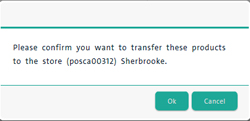
A confirmation popup appears.

Click the Ok button to send the transfer.
OR
Click the Cancel button to return to the Inventory transfers view without sending.
The Inventory Transfers screen reappears. Your on-hand inventory is decremented based on the quantity of each item on the transfer that was sent.
NOTE: Be sure that the outgoing transfer is correct before sending (e.g. the transfer is populated by the correct items in the proper quantities). Once a transfer has been committed by clicking Transfer, it cannot be edited nor undone. If you need to change something, change it before clicking Transfer.