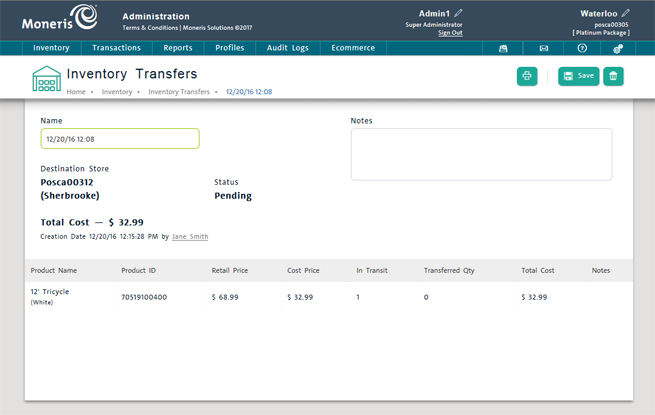
Use the Inventory Transfers screen to manage the incoming and outgoing inventory transfers between stores. Inventory transfers are a method to transfer inventory contained in PAYD Pro PlusTM between stores in an enterprise. They allow you to send inventory from your store location to another store, or to receive transferred inventory from another store location.
NOTE: Inventory transfers are only applicable to businesses that have the PAYD Pro Plus Multi Location Solution and other store locations that also have the PAYD Pro Plus In-Store Solution. This feature is available to businesses upon request.
NOTE: Inventory transfer functionality is not available in the PAYD Pro Plus App.
On the PAYD Administration main screen, click Inventory.
On the Inventory menu, under the Inventory section, click Inventory Transfer.
The Inventory Transfers screen displays a list of incoming and outgoing inventory transfers in PAYD Pro Plus.

From the Inventory Transfers screen, you can do the following:
NOTE: Depending on your user permissions, some functionality may be disabled or greyed out.
Show or hide transfers in the Incoming and Outgoing sections by clicking the All Statuses drop-down menu and selecting a transfer status following the guidelines listed below.
To view all transfers, leave the All Statuses drop-down menu alone. By default, all transfers are displayed.
Incoming transfers have the following options:
Completed - shows only completed (received) transfers.
Partially received - shows only partially received transfers i.e. transfers where only some of the items have been received while others are still outstanding.
Pending - shows only transfers that have been sent from the other store, but have not been accepted yet by your store.
Outgoing transfers have the following options:
Completed - shows only completed (completely sent) transfers.
Partially transferred - shows only partially sent transfers i.e. transfers where only some of the items have been sent while others are still waiting to be sent.
Pending - shows only transfers that have been sent from your store, but have not been accepted by the receiving store yet.
Draft - shows only transfers that have been created at your store, but have not been submitted yet.
Click the ![]() button at the top of the screen.
button at the top of the screen.
See Outgoing Inventory Transfers for more help.
On the list, click the transfer's name in the Name column.
Details of the transfer appear in the screen.

Under the Incoming Inventory Transfers section, click the transfer's name in the list.
See Incoming Inventory Transfers for more help.
It is only possible to edit the details of an outgoing transfer that has not been sent yet, and if you are the sending store. Once a transfer has been sent, it cannot be changed. It is not possible to edit an outgoing transfer if you are the receiving store.
On the list, click the transfer's name in the Name column.
Details of the transfer appear on the screen.
Use the details screen to edit the items being sent (add or remove items) and the quantities of the items.
On the list, click the transfer's name in the Name column.
Details of the transfer appear on the screen.
Click the  button at the top of the screen.
The transfer is immediately removed from the list.
On the list, click the transfer's name in the Name column.
Details of the transfer appear on the screen.
Click the  button at the top of the screen.
The Print dialog box appears.
Select your printer from the list and click the Print button.
The Product Search Results Screen