Use the Ecommerce - Options screen to manage language, visibility and policy options for your ecommerce website.
On the PAYD Administration main screen, click Ecommerce.
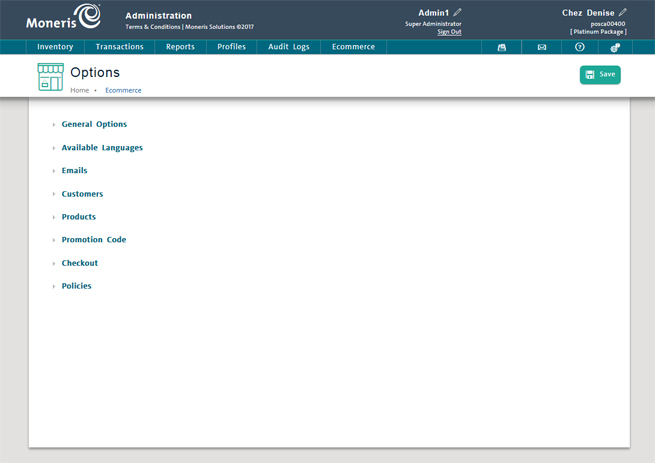
On the Ecommerce menu, under the eComm Options section, click Options.
The Options screen appears, divided into 8 sections (tabs).
The website title will appear on both the title bar and any tabs of a web browser. You can enter the title in both languages if required.
Click the General Options section header.
The General Options section expands.
In the Name section, enter the website's name in the English and French fields.
Click the Save button on top of the screen.
Meta tags are page description keywords and phrases used by search engines to bring up search results. When a potential customer conducts a search on an item, meta tags help return a result.
For example, let's assume that you are a retailer of extreme sports and camping equipment. You include meta tags for things like "mountain bikes", "snowboards" and "sleeping bags" in the Meta Tags section. A customer entering those terms in a Google search will have your website included in their search results.
NOTE: The meta tags being entered here should apply to your business and the ecommerce site overall. You enter product-specific meta tags in the product profile's Ecommerce tab.
Click the General Options section header.
The General Options section expands.
In the Web Site Description - Meta Tags section, click inside the English and French fields and enter the meta tags to describe your website.
Click the Save button on top of the screen.
It is possible to select the language your ecommerce website displays to customers. This setting places a language selector at the top of the website for customers to use. It changes language on Widgets, and other hard coded elements like shipping information etc.
Click the Available Languages section header.
The Available Languages section expands.
Select one of the following options:
● English only - the website will appear in English only.
● French only - the website will appear in French only.
● Both languages - the website will feature a language selector that the online customer can use to select their preferred display language.
Click the Save button at the top of the screen.
NOTE: This setting will apply to all pages and sub-pages of your PAYD Pro Plus ecommerce website only. It will not effect other unrelated pages.
Notification email addresses are used by recipients (at your business) of email generated by PAYD Pro Plus ecommerce website activity. There are three notification email addresses to enter:
● Merchant notifications - Use this email address to be notified that an order has been placed through the ecommerce website.
● Support Email (Reply To) - Use this email address to receive email receive an email when an online customer reaches out for help while using your ecommerce website.
● Support Email (From) - Use this email address to send responses to customer support emails received from the ecommerce website.
Click the Emails section header.
The Emails section expands.
Click the Notifications section header.
The Notifications section expands.
Click inside each email field and enter a valid email address to receive notifications (based on the explanations above).
NOTE: If multiple email addresses are required, separate the addresses by a comma e.g. [email protected], [email protected].
Click the Save button at the top of the screen.
PAYD Pro Plus provides you with the ability to draft default headers and footers for emails that are generated by ecommerce order events. These emails are generated by the system and sent to customers. Creating default headers and footers can save you time by including information pertinent to the type of event that just occurred, so that you do not need to type the same information for each individual email. Think of it like a "form letter".
NOTE: You do not need to create a default header and footer for every type of email. Only create defaults for the ones you wish to use.
You can create headers and footers for:
Reset password - when the customer requests a password reset, or clicks "Forgot Password" from your website.
Register welcome email - when the customer registers on your website to purchase products from your website.
Order creation - when an order is submitted by the customer from the ecommerce website (e.g. they have gone through the "checkout" process and have completed the order online).
Order shipment - when an order is shipped to the customer.
Order cancellation - when an order is cancelled by you in the Orders screen.
Returns - when an ecommerce website order is returned by you in the Orders screen.
Click the Emails section header.
The Emails section expands.
Click the Email Headers section header.
The Email Headers section expands.
Click inside the textbox of the type of header you wish to create e.g. Order shipment.
Type your header message into the text box. For assistance, please refer to "Using the HTML Text Editor".
Click the Emails section header.
The Emails section expands.
Click the Email Footers section header.
The Email Footers section expands.
Click inside the textbox of the type of footer you wish to create e.g. Order cancellation.
Type your header message into the text box. For assistance, please refer to "Using the HTML Text Editor".
These default headers and footers entered here can be overridden at a point prior to sending to a customer. You have the ability to preview and modify an email that will be sent to a customer before it is actually sent e.g. you have an order cancellation header entered, but you wanted to include some special instructions to the specific recipient. Please refer to Generating Emails from Ecommerce Orders for more information.
It is possible to define how the customers interact with the ecommerce website by configuring Customer options. Follow the guidelines below.
● Customers Can Register Themselves - use this drop-down menu to select whether or not a customer is able to create an account for themselves on the ecommerce website (a user name and password to be used for logon and account maintenance). The Yes option makes a Register button visible on the website. The No option prevents this button from being displayed.
● Show Prices to Registered Customers Only - use this drop-down menu to show product prices to customers who have registered an account and logged in under that account. The Yes option makes product prices visible once a customer registers a new account or logs in to an existing account, while hiding prices from unregistered site visitors. The No option makes product prices visible to any site visitor.
● Click the Customers header. The Customers section expands, displaying the options to configure.
In the Customers section, click the Customers can register themselves drop-down menu and choose one of the following options:
· To enable customers to register themselves (create an account), select Yes.
OR
· To prevent a customer from registering (by hiding the Register button), select No.
Click the Show Prices to Registered Customers Only drop-down menu and choose one of the following options:
· To show prices only to customers who have registered or logged in to their account, select Yes.
OR
· To show prices to any customers visiting the site, select No.
Click the Save button at the top of the screen to save your changes.
Product options enable you to select what is visible to customers and to determine if they can buy something that is currently out of stock.
● Click the Products header. The Products section expands, displaying the various options to configure.
In the Products section, click the drop-down arrow beside Show Stock Availability and select Yes.
Click the Save button at the top of the screen.
OR
In the Products section, click the drop-down arrow beside Show Stock Availability and select No.
Click the Save button at the top of the screen.
In the Products section, click the drop-down arrow beside Allow Out of Stock Sale and select Yes.
Click the Save button at the top of the screen.
NOTE: By enabling this setting, you are allowing customers to purchase items online that you do not have in stock. It is the merchant's responsibility to monitor of out-of-stock sales generated from the ecommerce website and ensure that the customer receives the items purchased in a timely manner.
OR
In the Products section, click the drop-down arrow beside Allow Out of Stock Sale and select No.
Click the Save button at the top of the screen.
In the Products section, click the drop-down arrow beside Hide Out of Stock Products and select Yes.
Click the Save button at the top of the screen.
OR
In the Products section, click the drop-down arrow beside Hide Out of Stock Products and select No.
Click the Save button at the top of the screen.
In the Products section, click the drop-down arrow beside Product Reviews and select Yes.
Click the Save button at the top of the screen.
OR
In the Products section, click the drop-down arrow beside Product Reviews and select No.
Click the Save button at the top of the screen.
If you are shipping packages to customers who have purchased items through the ecommerce website, it is strongly recommended that you fill out the item's dimensions in the product's Ecommerce tab. However, if you do not have the exact packaging dimensions for every product, you can enter the Default Packaging Size to at least enable the ecommerce site to calculate Expeditor and Table Rate Shipping,
NOTE: You do not need to enter default sizing if you are not shipping your products via integrated Expeditors or using table rate shipping calculations.
NOTE: The default sizes are entered in either Metric or Imperial units, based on your selection in the Units of Measure radio buttons in the Configuration - Settings screen.
● In the Default Shipping Package Size section, enter numeric values into the Length, Width, Height and Weight fields.
WARNING: Each field must be filled out for shipping rates to be properly calculated. Leaving one or more of the default package sizing fields blank will cause errors during shipping rate calculation.
Occasionally a customer might want to order something that is not able to be added their shopping cart. PAYD Pro Plus provides the ability to enter a default message to explain to the customer that the item is not available for online purchase.
● In the Message To Display When A Product Cannot Be Added To Shopping Cart section, click inside the English and French textboxes to enter a message.
NOTE: If these textboxes are left blank, PAYD Pro Plus will display a default message if the customer attempts to purchase an item that is not available for online purchase.
● Click the Promotion Code header. The Promotion Code section expands, displaying the option to configure.
In the Promotion Code section, click the drop-down arrow beside Use Shopcart Promotion Codes and select Yes.
Click the Save button at the top of the screen.
OR
In the Promotion Code section, click the drop-down arrow beside Use Shopcart Promotion Codes and select No.
Click the Save button at the top of the screen.
Use the Checkout section to indicate what payment methods you will accept when customers make online purchases and configure checkout behaviours.
● Click the Checkout header. The Checkout section expands, displaying the configuration options and the payment method checkboxes.
Select the payment methods that you will accept as payment for purchases made through your ecommerce website.
● Place a checkmark in a box beside a payment method to accept that payment.
● Leave boxes unchecked for the payment methods you will not be accepting.
The checked boxes will enable the card type's logo to be displayed on your website e.g. if you click Visa, the Visa logo will be visible on your website (on the Checkout page where customers enter their credit card information).
NOTE: Please check only the boxes that correspond to the payment methods you accept.
You can also allow or deny the ability for online customers to checkout as guests. This means that the customer's name and address details are not stored in a client profile in the Customers screen. The "guest customer" is a single instance transaction where the website collects their name, billing and shipping address, but doesn't store that information once the order is completed.
● To enable online customers to checkout as guests, click the Allow Guest Checkout drop-down menu and select Yes.
● To prevent guest checkout (forcing online customers to register as clients or login to their account before being able to proceed to checkout), click the Allow Guest Checkout drop-down menu and select No.
NOTE: When registered customers login to their accounts, they will be able to trace order status and obtain tracking numbers once an order is complete. Users checked in as guests to process transactions will not be able to do this.
You can indicate whether or not you will charge tax on Flat and Table rate shipping charges.
● To charge taxes on Flat and Table Rate shipping charges, click the Tax on shipping Flat/Table Rates drop-down menu and select Yes.
● To not charge taxes on Flat and Table Rate shipping charges, or if your rates already include taxes, click the Tax on shipping Flat/Table Rates drop-down menu and select No.
NOTE: Consult with your provincial tax agency for further guidance on charging taxes on shipping.
Use the Decline Orders with Mismatched CVD/AVS section to select the options to decline orders based a mismatch of CVD (Card Verification Digits) or AVS (Address Verification Service). CVD ensures that the card's three or four-digit CVC code matches with the 15 or 16-digit card number entered during checkout. AVS ensures the address entered for shipping matches with the card entered during checkout. AVS ensures the address entered for shipping matches with the card entered during checkout. An AVS failure means that the billing address entered does not match the address on file at the issuing bank e.g. the client's card was issued in Vancouver, but the customer enters a billing address in Toronto. You can select how the eCommerce system deals with CVD and/or AVS mismatches following the guidelines below:
● To have the system decline a transaction when a CVD mismatch occurs, click the CVD drop-down menu and select Yes, Decline on mismatch.
● To ignore CVD mismatches and allow transactions to approve, leave the CVD drop-down menu set to No (default).
● To have the system decline a transaction when a AVS mismatch occurs, click the AVS drop-down menu and select Yes, Decline on mismatch.
● To ignore address mismatches and allow transactions to approve, leave the AVS drop-down menu set to No (default).
NOTE: For more information on AVS and CVD, refer to Card Verification with CVD and AVS. For more information on AVS and CVD decline scenarios, please refer to Ecommerce Transaction Decline Rules. For more information on completing an order that came from your ecommerce website, refer to Completing Ecommerce Orders.
Use the Auto Capture section to select the options for automatically capturing payment at checkout. Once the customer's cart items are "paid for" (e.g. checked out), you can enable the system to automatically complete the checkout and capture payment, or you can manually capture payment when you are preparing to ship the customer's items.
● To enable the Auto Capture feature, click the Auto Capture drop-down menu and select Yes. To disable the Auto Capture feature, click the Auto Capture drop-down menu and select No. Setting Auto Capture to No means that you will be required to manually capture payment to complete ecommerce orders.
Next, you need to set the decline parameters for Auto Capture transactions.
● To have the system decline an Auto Capture if there is a CVD mismatch, click the drop-down menu under CVD and select Only when it matches.
● To have the system allow an Auto Capture complete even if there is a CVD mismatch, click the drop-down menu under CVD and select Even if it does not match.
● To have the system decline an Auto Capture if there is a AVS mismatch, click the drop-down menu under AVS and select one of the following:
• Only when the address matches - it will decline if the address matches but the postal code doesn't match.
• Only when the postal code matches - it will decline if the postal code matches but the address doesn't match.
● To have the system allow an Auto Capture complete even if there is an AVS mismatch, click the drop-down menu under AVS and select one of the following:
• When both address and postal code match
• Even if nothing matches.
NOTE: NOTE: For more information on AVS and CVD, refer to Card Verification with CVD and AVS. For more information on Auto Capture scenarios, please refer to Ecommerce Auto Capture Rules. For more information on completing an order that came from your ecommerce website, refer to Completing Ecommerce Orders.
Use the Policies section to enter policies that will be visible on the ecommerce website. These policies will inform customers how your business handles things like their privacy and product returns.
IMPORTANT: These policies must be entered in order to comply with Moneris regulations for transaction processing. If your site is not compliant, your ability to process purchases from the site will be limited until the policies have been entered.
● Click the Policies header. The Policies section expands, displaying the five types of policies you are able to configure.
Each of these policies launch the HTML Text Editor when you click inside them. Refer to the Using the HTML Text Editor topic to learn how to use this tool. These policies will be visible at the bottom of the ecommerce website.
Use the fields in the Policies section to present your policies as follows:
● Contact Us - Use the provided HTML text editor to enter information on how customers can contact the business. Enter the full business address, preferred phone and fax numbers as well as any additional contact information you wish to provide. This contact info will be visible when an online customer clicks the Contact Us link at the bottom of your ecommerce website.
IMPORTANT: It is mandatory to have contact information publicly available on your website in order to comply with Moneris regulations for online transaction processing. If your site does not display contact information, it will be deemed 'not compliant' and you will temporarily lose the ability to process payments until the situation is rectified.
● Terms & Conditions – Use the English/French fields to enter the terms of use for your ecommerce website.
● Privacy – Use the English/French fields to inform customers of your privacy policy with regards to collecting personal and billing data from them for the purposes of transacting ecommerce.
● Returns - Use the English/French fields to indicate your ecommerce return policy on merchandise purchased through the ecommerce website.
● Shipping - Use the English/French fields to inform customers of your shipping policy with regards to merchandise purchased through the Ecommerce website.
Moneris® is able to provide merchants with examples of ecommerce policies. Refer to the Sample Policy Examples topic for more information.
Moneris is able to provide samples of these policies to merchants, to provide a guideline of how to construct ecommerce website policies. These samples are provided for general information purposes only. Your use of any of these sample documents is at your own risk, and you should not use any of these sample documents without first seeking legal and other professional advice.
The provision of these sample documents (and the documents themselves) do not constitute legal advice or opinions of any kind, or any advertising or solicitation. No lawyer-client, advisory, fiduciary or other relationship is created between Moneris Solutions Corporation (Moneris) and any person accessing or otherwise using any of the sample documents.
Moneris and its affiliates (and any of their respective directors, officers, agents, contractors, interns, suppliers and employees) will not be liable for any damages, losses or causes of action of any nature arising from any use of any of the sample documents or the provision of these sample documents.
● Terms of Service Policy Example