After adding a new product (i.e., a Product Name), enter additional information for the product, including assigned product category, brand name, attribute names, pricing groups and fees as described in Adding or Editing Additional Product Information. After you finish entering this information, edit the product's default Product ID. Every product must have at least one Product ID.
You can also add a new product by copying an existing product (see Copying an Existing Product). Copying a product duplicates all the product information except the Product ID. You can then edit the new product's information as required.
NOTE: Before you can assign attribute values to a Product ID, you must assign attribute names to its parent product following the steps in this topic. You cannot add other Product IDs to a product that has no attribute names assigned.
Brand names, attributes, pricing groups and categories have to be set up on PAYD Pro PlusTM in advance through the Brand Names screen, Attributes screen, Pricing Groups screen and the Categories screen, respectively.
For PAYD Pro Plus Multi Location merchants, use the Multi Location Product Details to determine product availability at the stores.
Additional product information is entered in the following Product Details view tabs: Details, Attributes, Images & Videos, Pricing Groups, Categories, IDs, Related,Products, Fees and eCommerce.
NOTE: The steps below assume that you have just finished adding a new product. If you are returning to the Product Details view at a later time, see Viewing Product Details for help on finding and displaying a Product ID.
On the PAYD Administration main screen, click Inventory.
On the Inventory menu, under the Product section, click Product List.
The Product Search Results screen appears.
Search for the product you wish to edit.
Click on the product you wish to edit in the Product Search Results screen.
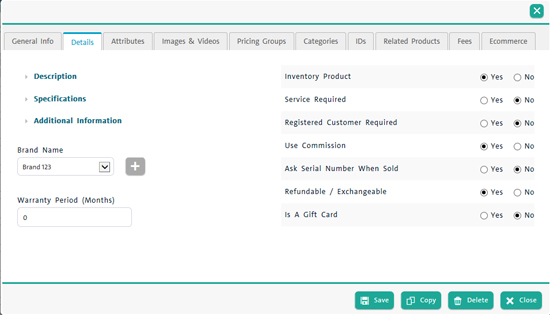
In the product's profile, click the Details tab.
Click the Description drop-down, and in the textboxes, enter an English or French description for the product. (Optional)
Click the Specifications drop-down, and in the textboxes, enter an English or French set of specifications for the product. (Optional)
Click the Additional Information drop-down, and in the textboxes enter any Additional Search Keywords (these are keywords that the product can be searched on) and any applicable Notes. (Optional)
To assign a brand name to the product, select it from the Brand Name drop-down list.
To define a warranty period, in the Warranty Period (Months) textbox, enter the number of months the product's warranty lasts after the sales date.
TIP: If a warranty does not apply to the product, do not enter a value.
Select the Yes or No radio buttons for the following options to enable or disable certain product behaviour based on the following guidelines:
● To indicate that the item being added is a product that goes into inventory, select Yes for the Inventory Product option.
OR
To define the item as a non-product (e.g. a service), select No for the Inventory Product option.
NOTE: For items flagged as No, they are not counted in Inventory Counts.
● To indicate that the product requires service, select Yes for the Service Required option. The default is No.
● To indicate that a customer must by assigned to all sales of the product, select Yes for the Registered Customer Required option. The default is No.
NOTE: When Registered Customer Required is set to Yes, the cashier is prompted to assign a customer at the time of sale (if one has not already been assigned).
● To indicate that sales commissions do not apply to the product, select No for the Use Commission option. The default is Yes.
NOTE: The Use Commission field appears only if "use commission" is enabled store-wide through the PAYD Pro Plus configuration settings. For more help, refer to Configuring Other Merchant Settings. When PAYD Pro Plus is configured to use commissions, all Inventory products are subject to a commission unless removed for specific products.
● To prompt for the serial number when the product is sold, select Yes for the Ask Serial Number When Sold option. The default is No.
● To indicate that the product is refundable and exchangeable, select Yes for the Refundable/Exchangeable option. The default is Yes.
● To indicate that the product is a gift card, click Yes for the Is A Gift Card option. The default is No.
NOTE: When you select Yes for the Is A Gift Card option, the gift card sale will not show up as profit in reports. Later sales using the gift card as the payment method will appear as profit.
At the bottom of the screen, click the Save button.
In the product's profile, click the Attributes tab.
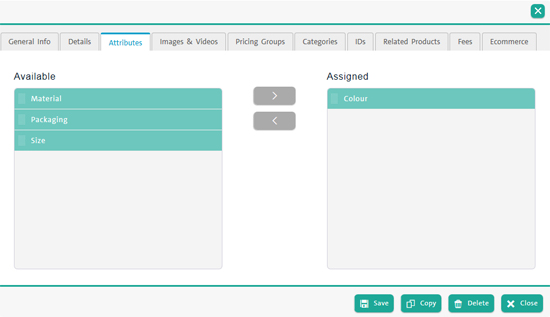
Select an attribute name in the Available list and drag-and-drop it in the Assigned list OR Click an attribute name in the Available list, then click the right-arrow button in the middle of the screen (![]() ).
).
TIP: To unassign an attribute name, drag-and-drop it back to the Available list. OR Click an attribute name in the Assigned list, then click the left-arrow button in the middle of the screen (![]() ).
).
Continue to assign attribute names as above as needed.
NOTE: You can assign a maximum of five (5) attribute names to each product. Make sure your attribute name assignment is adequate to fully define the attributes of each of the product's Product IDs. You must assign at least one attribute name before you can add other Product IDs to the product in addition to the default Product ID.
At the bottom of the screen, click the Save button.
An attribute values popup appears informing you that a default value will be assigned to the default Product ID for each of the assigned attribute names. The popup prompts you for confirmation or changes.
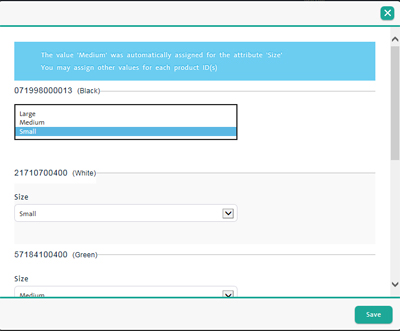
Do one of the following:
To accept the default attribute values, click the Save button.
To assign a different value to an attribute name, select the value from the attribute's drop-down list and then click the Save button.
The popup closes and attribute values are assigned to the default Product ID accordingly.
NOTE: You can view and edit these values when you edit the default Product ID.
At the bottom of the product's profile, click the Save button.
Add product images (see below).
Click the Images & Videos tab.
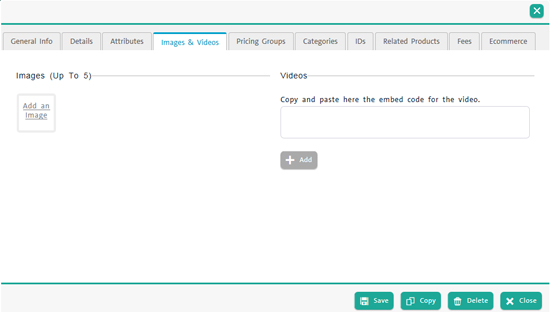
Click the Add an Image link.
The Choose File to Upload dialogue box appears.
In the Choose File to Upload dialogue, find and select a product image.
Click Open.
The popup closes and a thumbnail of the image appears in the Images & Videos tab.
TIP: To remove the selected image instead of uploading it, click its Remove button (![]() ).
).
Repeat steps 2 - 4 to continue adding images as needed.
NOTE: You can add up to five (5) images to each product. Images can be GIF, JPG or PNG and should not exceed 100K in size and 600x400 in dimension. You can add images to Product IDs as well.
To identify one of the images as the main product image, click its Main radio button.
At the bottom of the screen, click the Save button.
Assign pricing groups to the product.
NOTE: Product images are optional. If you do not add an image to a product, the PAYD Pro Plus logo is displayed by default.
The images that you add to the product details represent the default product ID. When the item is added to a transaction in the POS screen or found within a product search, the item's default image will be displayed beside it.
NOTE: It is possible to add images to the individual product IDs to depict different product variations represented by the individual product IDs. For example, if you have created multiple product IDs for an item with different colour variations, you can attach an image of each product variation in the IDs Images tab. Please refer to Adding Other Product IDs and Editing the Default Product ID for more information.
With the PAYD Pro Plus eCommerce module, it is possible to include product videos to embed into your eCommerce website, so that when a website customer is viewing product details online, they can view a video about the item in addition to pictures and product descriptions.
WARNING: Before using this video feature, please ensure that you have permission to use the video you wish to upload from the copyright holder, if applicable.
In the Images & Videos tab, click inside the textbox under the Videos section and paste an embed code.
Click the Add button.
The embed code for the video appears in an Existing video(s) field below.
At the bottom of the screen, click the Save button.
In the Images & Video tab, click the embed code inside the Existing video(s) textbox.
Click the Delete button.
The embed code for the video is removed from the Existing video(s) textbox.
At the bottom of the screen, click the Save button.
Click the Pricing Groups tab.
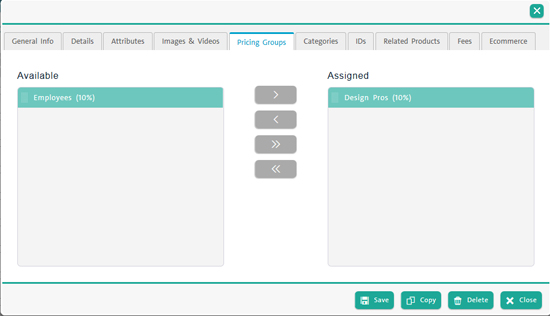
Select a pricing group in the Available list and drag-and-drop it in the Assigned list OR Click a pricing group in the Available list, then click the right-arrow button in the middle of the screen (![]() ).
).
TIP: To unassign a pricing group, drag-and-drop it back to the Available list OR Click a pricing group in the Assigned list, then click the left-arrow button in the middle of the screen (![]() ).
).
Continue assigning pricing groups as above as needed.
TIP: To assign all available pricing groups to the product, click the Add All button (![]() ). To remove all pricing groups from the Assigned list, click the Remove All button (
). To remove all pricing groups from the Assigned list, click the Remove All button (![]() ).
).
At the bottom of the screen, click the Save button.
Assign the product to a category (see below).
Click the Categories tab.
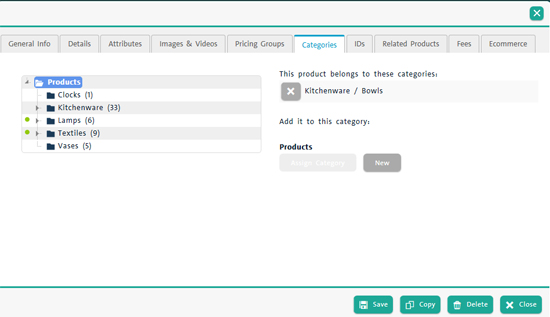
In the category hierarchy tree, find the category you want to assign to the product. Use the triangular icons (![]() ) to expand and collapse the tree.
) to expand and collapse the tree.
Click the category in the tree to select it.
An Assign Category button appears to the right of the tree.
Click the Assign Category button.
TIP: To unassign the category, click the Remove button (![]() ) next to the message.
) next to the message.
At the bottom of the screen, click the Save button.
NOTE: When you assign a category to a product, the category is automatically assigned to all of its Product IDs as well.
Link related products (see below).
NOTE: Related product linking applies only to products sold online. Related products are additional products you feel your customers should be made aware of when purchasing a particular product (e.g., batteries could be linked to a product that requires them). If you do not have the PAYD Pro Plus eCommerce module, this tab will not be visible.
Click the Related Products tab.

Click inside the Search field and search for the product by name or product ID.
HINT: To search all products, leave the Recherche field empty and click the search button (![]() ).
).
A product search popup appears.
To link a product in the list, click its Add button (![]() ).
).
The linked product appears in a list at the top of the tab.
TIP: To unlink a product, click its Remove button (![]() ).
).
Continue linking products as above as needed.
At the bottom of the screen, click the Save button.
Assign fees to the product (see below).
Click the Fees tab.

Select a fee in the Available list and drag-and-drop it in the Assigned list OR Click a fee in the Available list, then click the right-arrow button in the middle of the screen (![]() ).
).
TIP: To unassign a fee, drag-and-drop it back to the Available list OR Click a fee in the Assigned list, then click the left-arrow button in the middle of the screen (![]() ).
).
Continue assigning fees as above as needed.
TIP: To assign all available fees to the product, click the Add All button.![]() To remove all fees from the Assigned list, click the Remove All button.
To remove all fees from the Assigned list, click the Remove All button.![]()
At the bottom of the screen, click the Save button.
The PAYD Pro Plus eCommerce module enables products to be sold through an eCommerce website that is integrated with inventory entered into inventory. You can select which products can be sold online through the eCommerce website by entering information into the Product Details - eCommerce tab.
NOTE: The eCommerce tab will only be visible to merchants using the PAYD Pro Plus eCommerce module.
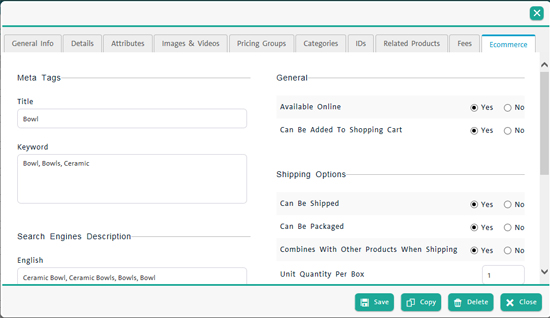
Click the Ecommerce tab.
Select Yes or No to the options under the General section on the right side of the screen using the following guidelines:
If this product is able to be sold on your eCommerce website, select the Yes option for Available Online; otherwise select No.
If this product is able to be added to the "shopping cart" when the customer is browsing your Morris eCommerce website, select the Yes option for Can Be Added To Shopping Cart; otherwise select No.
At the bottom of the screen, click the Save button.
NOTE: These two settings are set to Yes by default.
NOTE: It is possible to override these settings when editing the Brand or the Category to which the product belongs.
Under the Shipping Options section on the right side of the screen, select the Yes or No options using the following guidelines:
If this product can be shipped to customers who purchased it from the eCommerce website, select Yes for Can Be Shipped; otherwise select No.
If this product is already packaged for delivery e.g. it comes in a box or some sort of protective packaging, select Yes for This Product Is Packaged For Delivery? If the product is loose or unpackaged, select No.
If this product can be combined with others when being shipped, select Yes for Combines With Other Products When Shipping; otherwise select No.
NOTE: By default these settings are all set to Yes.
At the bottom of the screen, click the Save button.
Under the Dimensions section on the right side of the screen, enter the following dimensions for the product if it is being shipped after being purchased from your eCommerce website:
Length - Enter the item's/package's length into this field e.g. if the item is 6 1/2 inches long, enter "6.5".
Width - Enter the item's/package's width into this field e.g. if the item is 4 inches wide, enter "4".
Height - Enter the item's/package's height into this field e.g. if the item is 9 3/4 inches tall, enter "9.75".
Weight - Enter the item's weight (including the package's weight) into this field e.g. if the item is 2 pounds, enter "2".
TIP: These values can be entered in either Imperial or Metric units depending on how the Units of Measure setting has been configured in the Configuration Settings screen.
At the bottom of the screen, click the Save button.
NOTE: These settings have a direct impact on product shipping calculations as part of the eCommerce Shipping sections. The package's length, width, height and weight are used to calculate shipping charges to a customer once they enter their shipping address while making an online purchase. It is very important to fill out all fields for each product that you are selling online. Failure to do so will lead to errors in calculating shipping costs and potentially upset your customers.
On the left side of the screen, under the Meta Tags section, enter a meta tag title for the product into the Title field.
Enter any meta tags keywords into the Keyword field.
At the bottom of the screen, click the Save button.
On the left side of the screen, under the Search Engines Description section, enter a description of the product into the English and/or French fields as necessary.
At the bottom of the screen, click the Save button.
NOTE: These fields are optional. You do not need to enter a search engine description to sell this product online. However, an accurate description can aid in the product being found by an online consumer, thereby increasing your chances of selling the item to the customer.
Search for a product.
In the Product Search Results screen, click the name of the product that you want to copy.
The product's profile appears with the General Information tab selected.

Click the Copy button.
A confirmation popup appears.
Click Ok to confirm the copy.
In the Product copy popup, enter the new copy's default Product ID. The system uses this ID to populate the IDs tab (required; maximum 17 characters).

TIP: To have PAYD Pro Plus generate a Product ID for you, click the Generate button.
Enter an in-stock quantity in the In-Stock field.
Click the Copy button.
The copied product's profile displays the information for the product created by the copy process. Edit the information for the new product as required.
To edit the product details, update the information in the profile's tabs as described above in Adding or Editing Additional Product Information. To update the information in the General Information tab, see Adding a New Product.
To edit the product's default Product ID details, see Editing the Default Product ID.
For Multi Location merchants, it is possible to manage store product availability in the Multi Location Product Search Results screen. By default, items are available to all stores, but you can select (in each product's profile at the head office) which stores the product will be available in.
In the Multi Location main screen, click the Inventory menu.
On the Inventory menu, under the Product section, click Product List.
Search for a product in the Product Search Results screen.
Once the item is located, click the item's name in the list.
The product's profile appears.
On the General Info tab, scroll down to the Store Availability section.
In the Store Availability section, click the drop-down menu and choose Selected store(s).
The Unavailable and Available selection boxes appear below.
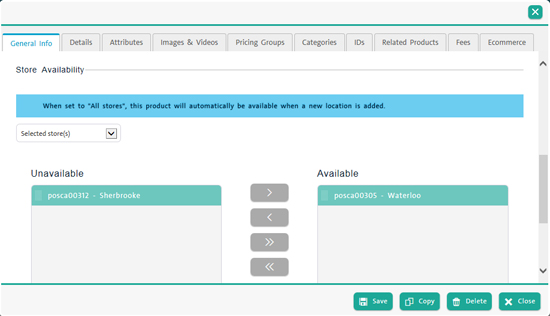
Select a store in the Available selection box, and click the left arrow (![]() ) to move the store into the Unavailable selection box.
) to move the store into the Unavailable selection box.
Repeat step 7 as necessary to remove this item from specific stores as necessary.
When finished, click the Save button.
Repeat steps 3 - 9 to remove other items from other stores.