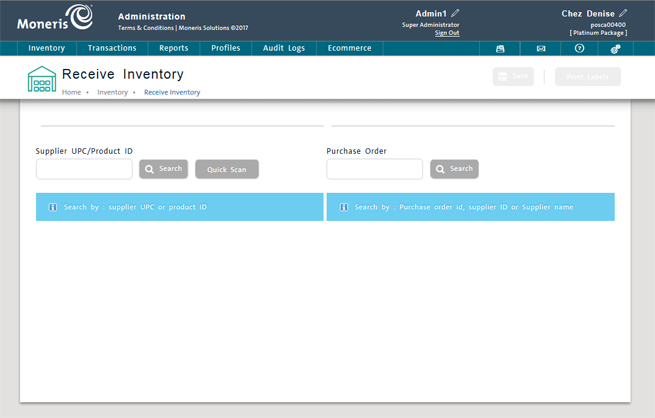
Use the Receive Inventory screen to quickly update in-stock quantities when you receive inventory. You can receive inventory by scanning the barcode (using Quick Scan), by product or against a supplier's purchase order (PO) (see Processing Purchase Orders).
When receiving inventory by product or against a PO, inventory can be received for existing products and new products. If the product exists and you have the proper permissions, you can choose to edit the product's pricing information as well. If the product is new and you have the proper permissions, you can choose to add the product to your inventory.
NOTE: If you do not have permission to receive inventory, this feature is disabled or greyed out.
On the PAYD Administration main menu, click Inventory.
On the Inventory menu, under the Inventory section, click Receive Inventory.
Go to one of the following:
You can use Quick Scan to add multiple products into the PAYD Pro PlusTM inventory by scanning the barcodes on their product labels.
NOTE: You can also scan a barcode to automatically populate the Supplier UPC/Product ID textbox on the Receive Inventory view. For more information, see Receiving Inventory by Product.
In the Receive Inventory screen, click the Quick Scan button.
The Quick Scan popup appears.

Scan the barcode for each product you want to add to the inventory, and when the Product ID field populates, click the Add button.
After each scanned product, a confirmation message appears on the popup stating the new in-stock quantity of the product ID.
NOTE: You can also manually add a product to the inventory using the Quick Scan popup by entering the Product ID and clicking the Add button.
When you are finished scanning products, click Close to dismiss the Quick Scan popup.
In the Receive Inventory screen, enter the product ID or the supplier's product UPC in the Supplier UPC/Product ID textbox.
TIP: You can automatically add the product ID to the Supplier UPC/Product ID textbox by scanning the product's barcode while in the Receive Inventory screen.
Click the Search button.

Do one of the following:
If the product already exists, product details appear on the screen below. Follow the steps in Processing Receipt if the Product Exists (by Product) below.
If the product is new and you have Add Inventory permissions, a confirmation popup asks you whether you would like to add the product to your inventory now. To add the product, click Yes and follow the steps in Processing Receipt if the Product is New (by Product) below. Otherwise click Cancel to close the popup and return to the Receive Inventory screen.
If the product is new and you do NOT have Add Inventory permissions, a message informs you that the product does not exist and that it needs to be added before you can receive inventory for it. Speak to your supervisor and request for the product to be added by a user with the proper permissions. Once the product is added, you can return to the Receive Inventory screen and update quantities as needed.
If the product you have selected already exists in inventory, its details appear in the view below. If you do NOT have Edit Inventory permissions, all fields other than Quantity are read-only.
NOTE: Fields highlighted in yellow are mandatory.
In the Quantity field, enter the quantity of the product received (required). The number must be greater than 0.
Click the Save button to save your work.
A message at the top of the view confirms the quantity added and the new in-stock quantity.
NOTE: If the product has an inactive status, a popup appears asking if you would like to reactivate it.
In the Quantity field, enter the quantity received of the Product ID (required). The number must be greater than 0.
NOTE: A note above the field displays the amount currently in stock.
In the Product Name fields enter the Product ID's parent Product Name.
Complete the Prices fields as necessary, following the guidelines below:
Retail price - The price that will be charged to the customer for the parent Product Name's Product IDs (required but may be 0.00). Can be overridden specifically for the Product ID (see Retail Price below).
List price - The retail price recommended by the manufacturer.
Cost price - The price you pay (i.e., the merchant price). Can be overridden specifically for the Product ID (see Cost Price below).
To override the retail price inherited from the Product Name (see Step 3) or to change the current retail price for the Product ID, select the appropriate Retail Price radio button and fill in the corresponding field following the guidelines below:
Fixed retail price - The desired retail price for the Product ID (may be 0.00).
Modifier percent - The desired price variance as a percentage of the Product Name's retail price. Use a minus (-) or plus (+) sign to indicate whether the difference is an increase or a decrease in price (may be 0.00).
EXAMPLE: If the Product Name retail price is $21.99 and you want to reduce it by 10% for the Product ID, enter -10. This will effectively set the Product ID's retail price to $19.79.
Modifier amount - The desired price variance as an amount in dollars and cents. Use a minus (-) or plus (+) sign to indicate whether the difference is an increase or a decrease in price (may be 0.00).
EXAMPLE: If the Product Name retail price is $21.99 and you want to increase it by $2.00 for the Product ID, enter +2.00. This will effectively set the Product ID's retail price to $23.99.
To override the cost price inherited from the parent Product Name (see Step 3) or to change the current cost price for the Product ID, select the appropriate Cost Price radio button and fill in the corresponding field following the guidelines below:
Fixed cost price - The appropriate cost price for the Product ID (may be 0.00).
Modifier percent - The appropriate price variance as a percentage of the Product Name's cost price. Use a minus (-) or plus (+) sign to indicate whether the difference is an increase or a decrease in price (may be 0.00).
EXAMPLE: If the Product Name cost price is $21.99 and it should be reduced by 10% for the Product ID, enter -10. This will effectively set the Product ID's cost price to $19.79.
Modifier amount - The appropriate price variance as an amount in dollars and cents. Use a minus (-) or plus (+) sign to indicate whether the difference is an increase or a decrease in price (may be 0.00).
EXAMPLE: If the Product Name cost price is $21.99 and it should be increased by $2.00 for the Product ID, enter +2.00. This will effectively set the Product ID's cost price to $23.99.
Click the Save button to save your work.
A message at the top of the view confirms the quantity added and the new in-stock quantity.
NOTE: If the product has an inactive status, a popup appears asking if you would like to reactivate it.
If the product is new (i.e., the Product ID does not currently exist in the product inventory) and you have Add Inventory permissions, a confirmation popup asks you whether you would like to add the product to your inventory now. When adding a new Product ID you must also add its parent Product Name.
NOTE: Fields highlighted in yellow are mandatory.
In the Receive Inventory screen, enter the product ID or the supplier's product UPC in the Supplier UPC/Product ID textbox.
TIP: You can automatically add the product ID to the Supplier UPC/Product ID textbox by scanning the product's barcode while in the Receive Inventory screen.
Click the Search button.
Because it is a new product, the system will not recognize its UPC. A confirmation popup appears.
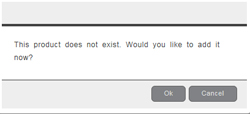
On the confirmation popup, click OK.
Fields for the new product's details appear in the view below Create a New Product.

In the Quantity field, enter the quantity received of the Product ID (required). The number must be greater than 0.
In the General Info section, enter the product's name in the English and French fields as required.
Complete the Prices fields as necessary, following the guidelines below:
Retail price - The price that will be charged to the customer for the parent Product Name's Product IDs (required but may be 0.00). Can be overridden specifically for the Product ID (see Retail Price below).
List price - The retail price recommended by the manufacturer.
Cost price - The price you pay (i.e., the merchant price). Can be overridden specifically for the Product ID (see Cost Price below).
To set up a retail price specifically for the Product ID (and override the Product Name retail price entered in Step 4), select the appropriate Retail Price radio button and fill in the corresponding field following the guidelines below:
Fixed Retail - The desired retail price for the Product ID (may be 0.00).
Modifier Percent - The desired price variance as a percentage of the Product Name's retail price. Use a minus (-) or plus (+) sign to indicate whether the difference is an increase or a decrease in price (may be 0.00).
EXAMPLE: If the Product Name retail price is $21.99 and you want to reduce it by 10% for the Product ID, enter -10. This will effectively set the Product ID's retail price to $19.79.
Modifier Amount - The desired price variance as an amount in dollars and cents. Use a minus (-) or plus (+) sign to indicate whether the difference is an increase or a decrease in price (may be 0.00).
EXAMPLE: If the Product Name retail price is $21.99 and you want to increase it by $2.00 for the Product ID, enter +2.00. This will effectively set the Product ID's retail price to $23.99.
To set up a cost price specifically for the Product ID (and override the Product Name cost price entered in Step 4), select the appropriate Cost Price radio button and fill in the corresponding field following the guidelines below:
Fixed Cost - The appropriate cost price for the Product ID (may be 0.00).
Modifier Percent - The appropriate price variance as a percentage of the Product Name's cost price. Use a minus (-) or plus (+) sign to indicate whether the difference is an increase or a decrease in price (may be 0.00).
EXAMPLE: If the Product Name cost price is $21.99 and it should be reduced by 10% for the Product ID, enter -10. This will effectively set the Product ID's cost price to $19.79.
Modifier Amount - The appropriate price variance as an amount in dollars and cents. Use a minus (-) or plus (+) sign to indicate whether the difference is an increase or a decrease in price (may be 0.00).
EXAMPLE: If the Product Name cost price is $21.99 and it should be increased by $2.00 for the Product ID, enter +2.00. This will effectively set the Product ID's cost price to $23.99.
Click the Save button at the top of the screen.
The product is added to your inventory with the Product ID you entered during the search, and a confirmation message appears on the screen.
Repeat steps 1 - 9 to receive other new products.
In the Receive Inventory screen, enter Purchase Order ID, supplier ID or supplier name in the Purchase Order textbox.
Click the Search button.
The search results appear in the Receive Inventory screen.

If multiple purchase orders were returned (because you searched by supplier), click the Select button for the PO you want to process.
The Receive Inventory - Purchase Order screen appears.
NOTE: If only one PO matches your search, it is automatically displayed in the Receive Inventory - Purchase Order screen.
View the items on order by leaving the textbox blank and click the Search button.
Information for all products in the PO appears in the Products popup.
NOTE: You can also select a specific product on the PO by searching on its supplier UPC, Product ID or Product Name.
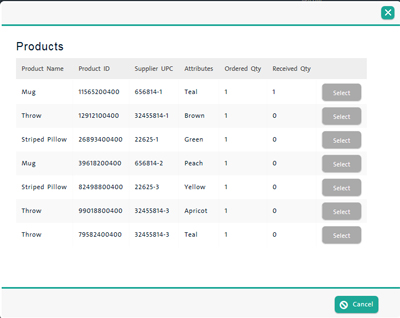
Do one of the following:
To receive items one at a time by scanning them with the barocde scanner:
o On the list, click the Select button to the right of the product you are receiving. Proceed to step 6.
NOTE: If there is only one product in the PO or if you have selected a specific product, the product is automatically selected for you.
OR
To receive all items at once, click the Cancel button on the bottom of the Products screen.
You are returned to the Receive Inventory screen.
Click the Receive all button.
The system prompts you to confirm you are receiving all items at once.
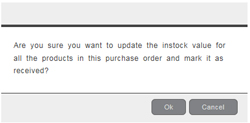
Click the Ok button.
You are returned to the Receive Inventory screen. The items are received and you can stop here.
Do one of the following:
If the product already exists, product details appear in the Receive Inventory - Purchase Order screen. Follow the steps in Processing Receipt if the Product Exists (by PO) below.
If the product is new and you have Add Inventory permissions, a confirmation popup asks you whether you would like to add the product to your inventory now. To add the product, click Yes and follow the steps in Processing Receipt if the Product is New (by PO) below. Otherwise click Cancel to close the popup and return to the Receive Inventory - Purchase Order screen.
If the product is new and you do NOT have Add Inventory permissions, a message informs you that the product does not exist and that it needs to be added before you can receive inventory for it. Speak to your supervisor and request for the product to be added by a user with the proper permissions. Once the product is added, you can return to the Receive Inventory screen and update quantities as needed.
Repeat steps 3 to 5 above for each product on the PO you are receiving.
NOTE: If you receive inventory for all products in the PO as ordered (exact quantities), the PO's status is changed to Receive, the PO is updated to show the quantity received against the quantity ordered, and no more inventory can be received against the PO. If you receive inventory for only some of the products in the PO or for partial quantities, the PO's status remains Ordered, the PO is updated to show the quantity received against the quantity ordered, and the PO can continue to have inventory received against it.
Click the Print Labels button at the top of the Receive Inventory screen.
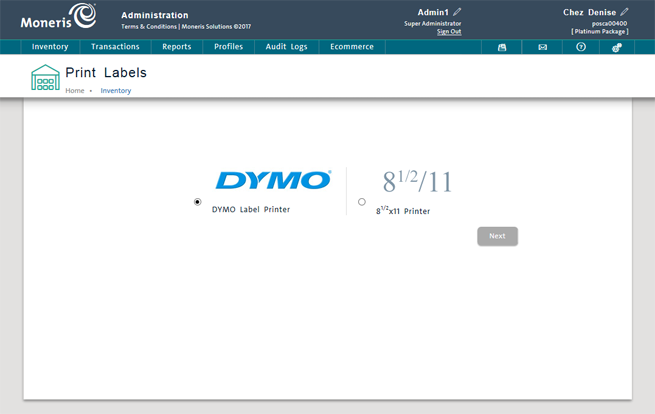
NOTE: If a dialogue box asks you to select a printer, click the 81/2 / 11 radio button and click Next.
The Print Labels view appears displaying the labels for only the items received on the order (if the order was partially received, or for all the products in the order if it was completely received).
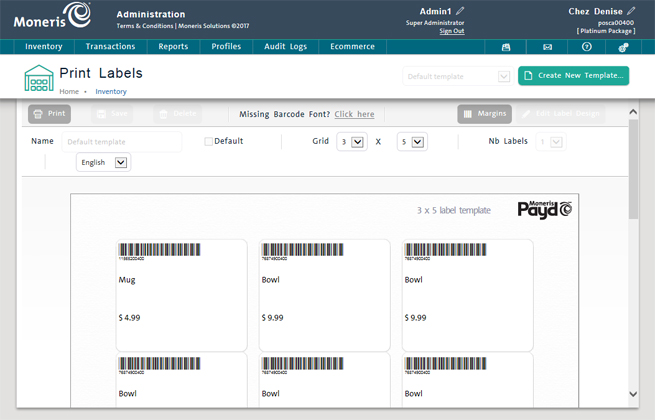
To print the product labels, click Print on the Print Labels screen. For more help, see Printing Product Labels.
To return to the Receive Inventory screen, click the Back button on the Print Product Labels screen.
NOTE: You are returned to a blank Receive Inventory screen. You are not returned to the previously selected PO.
If the product you have selected already exists in inventory, its details appear in the Receive Inventory - Purchase Order screen. If you do NOT have Edit Inventory permissions, all fields other than Quantity are read-only.
In the Quantity field, enter the quantity of the product received (required). The number must be greater than 0.
NOTE: The quantity ordered in the PO appears above the field.
Click the Save button at the top of the screen.
A message at the top of the view confirms the quantity added and the new in-stock quantity.
NOTE: If the product has an inactive status, a popup appears asking if you would like to reactivate it.
In the Quantity field, enter the quantity received of the Product ID (required). The number must be greater than 0.
NOTE: A note above the field displays the amount currently in stock.
In the Product Name fields enter the Product ID's parent Product Name.
Complete the Prices fields as necessary, following the guidelines below:
Retail Price - The price that will be charged to the customer for the parent Product Name's Product IDs (required but may be 0.00). Can be overridden specifically for the Product ID (see Retail Price below).
List Price - The retail price recommended by the manufacturer.
Cost Price - The price you pay (i.e., the merchant price). Can be overridden specifically for the Product ID (see Cost Price below).
To override the retail price inherited from the Product Name (see Step 3) or to change the current retail price for the Product ID, select the appropriate Retail Price radio button and fill in the corresponding field following the guidelines below:
Fixed Retail - The desired retail price for the Product ID (may be 0.00).
Modifier Percent - The desired price variance as a percentage of the Product Name's retail price. Use a minus (-) or plus (+) sign to indicate whether the difference is an increase or a decrease in price (may be 0.00).
EXAMPLE: If the Product Name retail price is $21.99 and you want to reduce it by 10% for the Product ID, enter -10. This will effectively set the Product ID's retail price to $19.79.
Modifier Amount - The desired price variance as an amount in dollars and cents. Use a minus (-) or plus (+) sign to indicate whether the difference is an increase or a decrease in price (may be 0.00).
EXAMPLE: If the Product Name retail price is $21.99 and you want to increase it by $2.00 for the Product ID, enter +2.00. This will effectively set the Product ID's retail price to $23.99.
To override the cost price inherited from the parent Product Name (see Step 3) or to change the current cost price for the Product ID, select the appropriate Cost Price radio button and fill in the corresponding field following the guidelines below:
Fixed Cost - The appropriate cost price for the Product ID (may be 0.00).
Modifier Percent - The appropriate price variance as a percentage of the Product Name's cost price. Use a minus (-) or plus (+) sign to indicate whether the difference is an increase or a decrease in price (may be 0.00).
EXAMPLE: If the Product Name cost price is $21.99 and it should be reduced by 10% for the Product ID, enter -10. This will effectively set the Product ID's cost price to $19.79.
Modifier Amount - The appropriate price variance as an amount in dollars and cents. Use a minus (-) or plus (+) sign to indicate whether the difference is an increase or a decrease in price (may be 0.00).
EXAMPLE: If the Product Name cost price is $21.99 and it should be increased by $2.00 for the Product ID, enter +2.00. This will effectively set the Product ID's cost price to $23.99.
Click the Save button at the top of the screen.
A message at the top of the view confirms the quantity added and the new in-stock quantity.
NOTE: If the product has an inactive status, a popup appears asking if you would like to reactivate it.
If the product is new (i.e., the Product ID does not currently exist in the product inventory) and you have Add Inventory permissions, a confirmation popup asks you whether you would like to add the product to your inventory now. When adding a new Product ID from a PO you must also add its parent Product Name.
In the Receive Inventory screen, enter the product ID or the supplier's product UPC in the Supplier UPC/Product ID textbox.
TIP: You can automatically add the product ID to the Supplier UPC/Product ID textbox by scanning the product's barcode while in the Receive Inventory screen.
Click the Search button.
Because it is a new product, the system will not recognize its UPC. A confirmation popup appears.
On the confirmation popup, click OK.
Fields for the new product's details appear in the view below Create a New Product.
In the Quantity field, enter the quantity received of the Product ID (required). The number must be greater than 0.
In the General Info section, enter the product's name in the English and French fields as required.
Complete the Prices fields as necessary, following the guidelines below:
Retail Price - The price that will be charged to the customer for the parent Product Name's Product IDs (required but may be 0.00). Can be overridden specifically for the Product ID (see Retail Price below).
List Price - The retail price recommended by the manufacturer.
Cost Price - The price you pay (i.e., the merchant price). Can be overridden specifically for the Product ID (see Cost Price below).
To set up a retail price specifically for the Product ID (and override the Product Name retail price entered in Step 4), select the appropriate Retail Price radio button and fill in the corresponding field following the guidelines below:
Fixed Retail - The desired retail price for the Product ID (may be 0.00).
Modifier Percent - The desired price variance as a percentage of the Product Name's retail price. Use a minus (-) or plus (+) sign to indicate whether the difference is an increase or a decrease in price (may be 0.00).
EXAMPLE: If the Product Name retail price is $21.99 and you want to reduce it by 10% for the Product ID, enter -10. This will effectively set the Product ID's retail price to $19.79.
Modifier Amount - The desired price variance as an amount in dollars and cents. Use a minus (-) or plus (+) sign to indicate whether the difference is an increase or a decrease in price (may be 0.00).
EXAMPLE: If the Product Name retail price is $21.99 and you want to increase it by $2.00 for the Product ID, enter +2.00. This will effectively set the Product ID's retail price to $23.99.
To set up a cost price specifically for the Product ID (and override the Product Name cost price entered in Step 4), select the appropriate Cost Price radio button and fill in the corresponding field following the guidelines below:
Fixed Cost - The appropriate cost price for the Product ID (may be 0.00).
Modifier Percent - The appropriate price variance as a percentage of the Product Name's cost price. Use a minus (-) or plus (+) sign to indicate whether the difference is an increase or a decrease in price (may be 0.00).
EXAMPLE: If the Product Name cost price is $21.99 and it should be reduced by 10% for the Product ID, enter -10. This will effectively set the Product ID's cost price to $19.79.
Modifier Amount - The appropriate price variance as an amount in dollars and cents. Use a minus (-) or plus (+) sign to indicate whether the difference is an increase or a decrease in price (may be 0.00).
EXAMPLE: If the Product Name cost price is $21.99 and it should be increased by $2.00 for the Product ID, enter +2.00. This will effectively set the Product ID's cost price to $23.99.
Click the Save button at the top of the screen.
The product is added to your inventory with the Supplier UPC specified in the PO, and a confirmation message appears on the screen.
When receiving inventory, if you receive the following error message: "In-stock quantity exceeds the maximum. Proceed anyway?", this message refers to the product's current on hand value, the value that you are receiving, and the minimum and maximum quantity set in the products ID's Inventory tab.
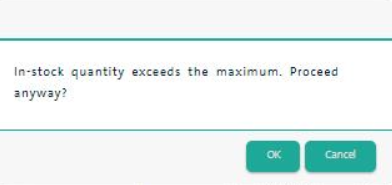
For example, if a product's current In-Stock value is 3, the Minimum Quantity is 2, the Maximum Quantity is 6, and you are receiving 5, you will encounter this error because the In-Stock level will rise to 8 after the 5 items have been received, which is higher than the Maximum Quantity setting. You can click OK and receive the inventory anyway. If you click Cancel, you are returned to the Receive inventory screen to make adjustments.
Entering Additional Product Information
Editing the Default Product ID