Scroll through the table to locate the Product ID.
Click the corresponding product label icon(![]() ).
).
Go to Designing/Printing Labels below.
Use the Product Search Results screen in PAYD Administration to print labels for your products.
PAYD Pro Plus' label printing functionality includes support for a standard 8.5 x 11 printer as well as DYMO LabelWriter 450, label printing for a single product or a subset of products in your inventory, and custom label creation with PAYD Pro Plus 's drag-and-drop label designer. Printing product labels is a two-step process:
On the PAYD Administration main screen, click the Inventory menu.
On the Inventory menu, under the Product section, click Product List.
The first step in printing product labels is to select the product (or products) for which you would like to print labels. PAYD Pro Plus allows you to select a single product or a subset of products in your inventory. You can select the subset of products as precisely as you want by doing a simple search or an advanced search. You may also print labels for items received against a purchase order.
Search for the product.
On the Product Search Results screen, click a Product Name.
Details of the product appear on the screen.
Click the IDs tab.
A list of the associated Product IDs appears on the screen.
Scroll through the table to locate the Product ID.
Click the corresponding product label icon(![]() ).
).
Go to Designing/Printing Labels below.
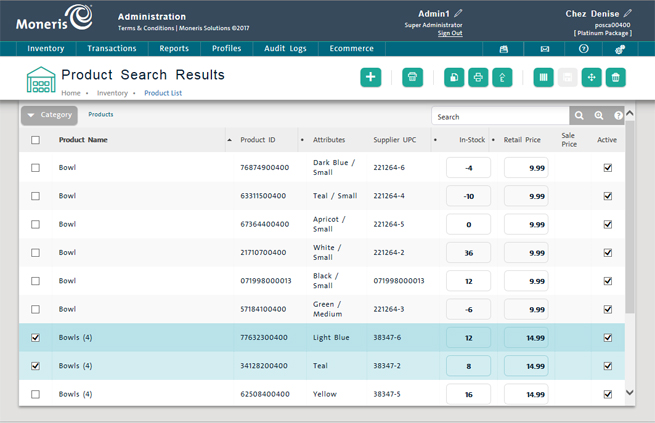
In the Product Search Results screen, select the products you want to print labels for by:
Browsing through the inventory product list and selecting the checkboxes for each product you want to print labels for. Selected products are remembered when you go to other pages in the inventory list to allow you to select products on multiple inventory pages.
OR
Using the search buttons at the top of the screen to select a subset of products (simple search![]() or advanced search
or advanced search![]() ). For detailed help, see Searching Products.
). For detailed help, see Searching Products.
At the top of the view, click the Print Labels icon (![]() ).
).
Go to Designing/Printing Labels below.
Refer to the Receiving Inventory topic for more information.
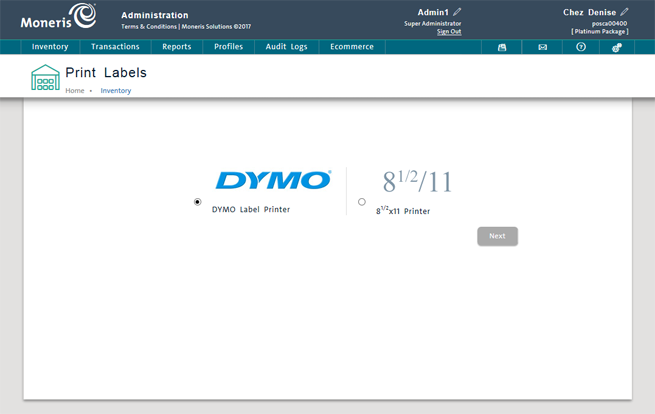
Once you have selected the product(s) you want to print labels for, you select or design a label template using the Print Product Labels view and then print. There are two versions of the view, and the version you use depends on which label printer you select: a standard 8.5 x 11 printer or DYMO LabelPrinter 450.
As described above, click the Print Labels icon (![]() ).
).
NOTE: If a dialogue box asks you to select a printer, click the 81/2 / 11 radio button and click Next.
On the view's header, select the Default template from the drop-down list.
On the left side of the header, click the Print button.
To make the selected template the default template, on the ribbon below the header, select the Default checkbox.
To specify a label grid, select the appropriate values from the Grid drop-down lists e.g. for 3 columns and 5 rows, you would select "3 X 5".
To specify the number of labels you want printed per product, select the number from the Nb labels drop-down list.
On the ribbon below the view's header, click the Margins button.
The Page/Label Margins popup appears.
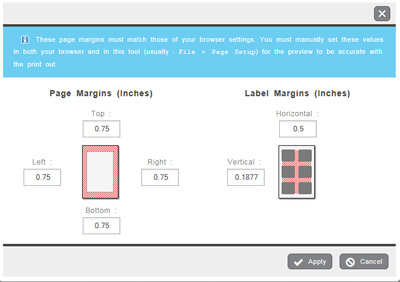
Under the Page Margins section on the left, enter the desired Top, Bottom, Left and Right margins for the template in inches.
Under the Label Margins section on the right, enter the desired Vertical and Horizontal margins for the labels in inches.
Click Apply at the bottom of the popup.
The popup closes and changes are reflected on the view's template preview.
On the ribbon below the view's header, click the Edit Label Design button.
A label design popup appears.
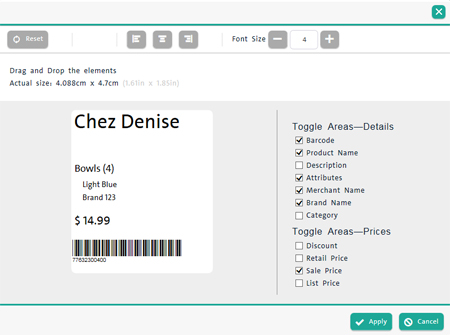
Under Toggle Areas section on the right side of the popup, select the elements you would like to appear on your labels (Details and Prices).
On the interactive label area, drag and drop elements to position them as you would like them to appear on your labels.
To set an element's properties (colour, alignment, font size), click the element to select it and make the necessary changes using the controls that appear below the interactive label area.
Click Apply at the bottom of the popup.
The popup closes and changes are reflected on the view's template preview.
Scroll down to the bottom of the view's template preview.
Page through the label sheets until you find the sheet you want.
To delete a label on the sheet grid, place your mouse pointer over the label and click the X.
To move a label to the next position on the grid, place your mouse pointer over the label and click the >.
To move a label back into a previous blank position on the grid, place your mouse pointer over the blank position and click the <.
On the view's header, click inside the Name field and enter a name for the template.
Click the Create New Template... button on the view's header.
Configure/design the template as needed, following the instructions above (in the To edit label design section).
Click the Save button.
On the view's header, select the template from the drop-down list.
Click the Edit Label Design button.
Make the necessary changes following the instructions above (in the To edit label design section).
Click the Save button.
NOTE: You cannot save changes made to the Default PAYD Pro Plus template.
On the view's header, select the template from the drop-down list.
On the ribbon below the header, click the Delete button.
A confirmation popup appears.
Click the Ok button to confirm the deletion.
OR
Click the Cancel button to cancel the operation and return to the Print Labels screen.
Once you have defined the label layout, follow these steps to print labels from a Dymo LabelWriter.
From the PAYD Administration main screen, click Inventory.
On the Inventory menu, click Product List.
In the Product Search Results screen, click the product label icon ![]() .
.
A printer selection dialogue box appears.
Select the Dymo Label Printer radio button and click Next.
Select the template you want to use from the Select The Label drop-down list.
NOTE: To add a new label (that you defined in the DYMO Label software) to the Select The Label drop-down list, click the Add button and browse your computer for the saved label layout. If you need to edit one of the label layouts in the DYMO Label software, download it to your computer, edit it within the DYMO Label software, and save it. For more information, refer to Downloading Label Layouts.
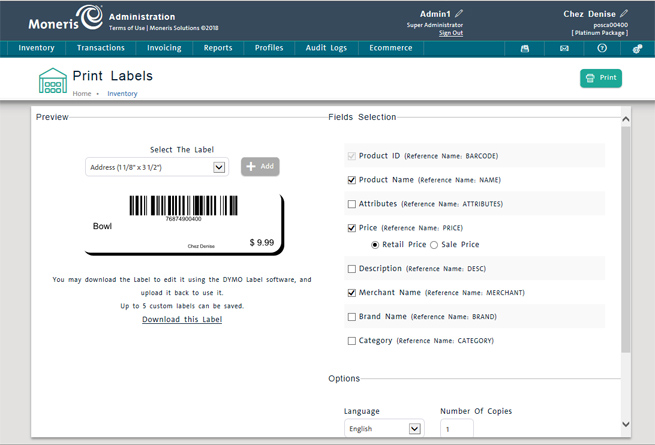
Under Fields Selection, select the elements you want to appear on your labels. The reference for each element is shown in brackets.
In the Options: Number of copies field, enter the number of labels you want to print per product.
Make sure DYMO LabelWriter 450 is selected from the Options: Printer drop-down list.
At the top of the screen, click Print.
The labels should begin to print from the Dymo LabelWriter, and a printing confirmation popup appears.
Click OK on the confirmation popup.
The Product Search Results Screen
Editing the Default Product ID