
After you add a new product and enter additional product information, you must edit the product's default Product ID following the steps in this topic. Every product must have at least one Product ID.
You edit Product IDs in its profile (displayed by selecting the Product ID in the product's IDs tab). The Product ID Details popup has the following tabs: General Information, Attribute Values, Images and Inventory.
NOTE: When editing the default Product ID, you will assign attribute values to it. Before you assign these values, make sure you have adequately assigned attribute names to the Product ID's parent product name when you entered additional product information.
NOTE: You can view a history of inventory changes using the Inventory Change Log (see To view a history of inventory changes).
NOTE: The steps below assume that you have just finished entering additional information for a new product. If this is not the case, see Viewing Product Details for help on finding and displaying a Product ID.
In the PAYD Administration main screen, click the Inventory menu.
On the Inventory menu, under the Product section, click Product List.
The Product Search Results screen appears.
Search for the product you wish to edit.
Click on the product's name in the Product Search Results screen.
The Product Details popup appears with the General Information tab selected.
On the Product Details popup, click the IDs tab.
The default Product ID appears in the tab.
Click the Product ID.
The Product ID Details popup appears with the General Info tab selected.

Under the General section, leave Status set to Active.
NOTE: Inactive product IDs cannot be added to a sale.
If necessary, change the Product ID (maximum 17 characters).
TIP: To have PAYD Pro PlusTM generate an ID for you, click the Generate button.
Select the name of the Product ID's supplier from the Supplier drop down list (optional). For help on suppliers, see The Supplier Search Results Screen.
In the Supplier UPC textbox, enter the code used by the supplier to identify the Product ID (optional).
Under the Retail Price section, note the Product ID's current Retail price. If you are editing the Product ID for the first time, this is the retail price inherited from the parent product.
To override the retail price inherited from the parent product, or to change the current retail price for the Product ID, select the appropriate Retail Price radio button and fill in the corresponding field as follows:
Fixed retail price - Enter the desired retail price for the Product ID.
Modifier percent - Enter the desired price variance as a percentage of the product's retail price. Use a minus (-) or plus (+) sign to indicate whether the difference is an increase or a decrease in price.
EXAMPLE: If the product's retail price is $21.99 and you want to reduce it by 10% for the Product ID, enter -10. This will effectively set the Product ID's retail price to $19.79.
Modifier amount - Enter the desired price variance as an amount in dollars and cents. Use a minus (-) or plus (+) sign to indicate whether the difference is an increase or a decrease in price.
EXAMPLE: If the product's retail price is $21.99 and you want to increase it by $2.00 for the Product ID, enter +2.00. This will effectively set the Product ID's retail price to $23.99.
NOTE: If you are not editing the Product ID for the first time, the Retail price field may not reflect the product's actual retail price. To view the actual retail price, close the popup and click the General Information tab on the Product Details popup.
Under the Cost Price section, note the Product ID's current Cost price. This price is inherited from the parent product unless the cost price has already been overwritten for the Product ID.
To override the cost price inherited from the parent product, or to change the current cost price for the Product ID, select the appropriate Cost Price radio button and fill in the corresponding field as follows:
Fixed cost price - Enter the appropriate cost price for the Product ID.
Modifier percent - Enter the appropriate price variance as a percentage of the product's cost price. Use a minus (-) or plus (+) sign to indicate whether the difference is an increase or a decrease in price.
EXAMPLE: If the product's cost price is $14.99 and it should be reduced by 10% for the Product ID, enter -10. This will effectively set the Product ID's cost price to $13.50.
Modifier amount - Enter the appropriate price variance as an amount in dollars and cents. Use a minus (-) or plus (+) sign to indicate whether the difference is an increase or a decrease in price.
EXAMPLE: If the product's cost price is $14.99 and it should be increased by $2.00 for the Product ID, enter +2.00. This will effectively set the Product ID's cost price to $16.99.
NOTE: If the cost price has already been overwritten for the Product ID as above, the Cost price field may not necessarily reflect the product's actual cost price. To view the actual cost price, close the popup and click the General Information tab on the Product Details popup.
At the bottom of the popup, click the Save button.
Retail and Cost Price are updated accordingly.
Click the Attribute Values tab.
The tab displays drop-down lists for each attribute name assigned to the parent product.
NOTE: Values are pre-selected based on your assignment of attribute names to the product.
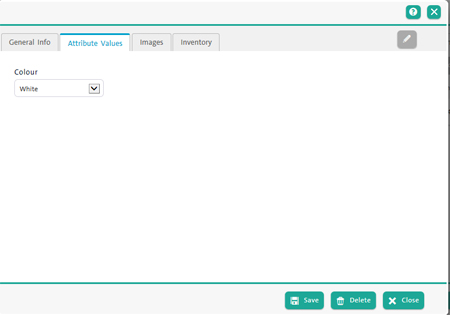
To change attribute values for the Product ID, select a new value from one or more of the attribute drop-down lists.
NOTE: If a value that you want to assign is not available, you will need to add the value through the Attributes screen (see Adding a New Attribute).
At the bottom of the popup, click the Save button.
Proceed to add Product ID images.
Click the Images tab.
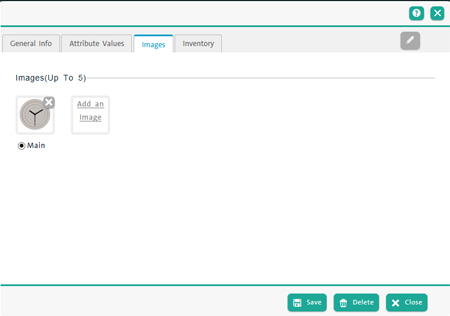
Click the Add an Image link.
In the Choose File to Upload dialogue, browse for and select an image for the Product ID and then click Open.
At the bottom of the popup, click the Save button.
A thumbnail of the image appears in the tab.
Repeat steps 2 - 4 to add images as needed.
NOTE: You can add up to five (5) images for each Product ID. Images can be GIF, JPG or PNG and should not exceed 100K in size and 600x400 in dimension. Images added to the Product ID override those added to the parent product.
To identify one of the images as the main product image, click its Main radio button.
NOTE: This is useful when you have multiple images of a product. The "Main" image is the one that will appear in product lists, when adding products to the bill, and, if applicable, when the product is selected on your eCommerce website.
At the bottom of the popup, click the Save button.
NOTE: To delete an image, click the X button in the top right corner of the image.
Proceed to edit Product ID inventory information.
NOTE: Product ID images are optional. If you do not add an image to a product ID, PAYD Pro Plus displays the product image. If you do not add an image to the parent product, the PAYD Pro Plus logo is displayed by default.
The images that you add to the product ID represent the specific ID to which they were added, not the default product. For example, if there are multiple product IDs for an item with different colour variations, you can attach an image of each product variation in the IDs Images tab. When the item is added to the transaction in the POS screen, or when it is found in a product search, the image that represents the specific ID will display beside the item.
NOTE: An image added to an item's IDs - Images tab represents that ID only. If you wish to have the image represent the product, not the specific variations, use the Images tab within the product profile. For more information, please refer to the Entering Additional Product Information topic.
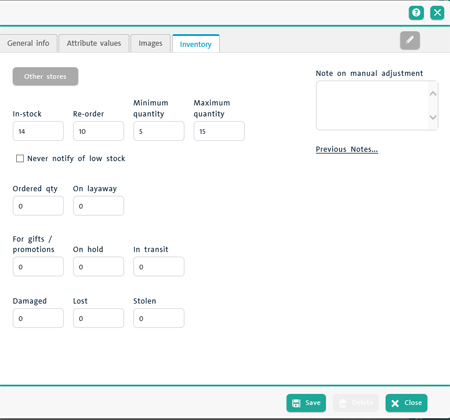
Click the Inventory tab.
If this is the first time you are editing the default Product ID, the tab displays inventory quantities inherited from the parent product.
Make the required changes for the Product ID following the guidelines below:
In-Stock - The quantity of the Product ID currently in inventory.
Re-Order - The quantity of the Product ID that must be re-ordered so that the desired in-stock quantity is in inventory.
Minimum Quantity - The inventory count for the Product ID that, when reached or exceeded, causes the product to be included in the Low Stock report with the Re-order quantity.
NOTE: You can also configure PAYD Pro Plus to send low stock email notifications for product IDs when their inventory counts reach their Minimum quantity settings (see Configuring Other Merchant Settings).
Maximum Quantity - Enter a value for the most of this product you want to carry in inventory at any time.
NOTE: This field is optional and can be left as "N/A".
Never Notify Of Low Stock - If PAYD Pro Plus is configured to send low stock email notifications, this checkbox indicates if an email notification is sent for the Product ID when the minimum quantity is reached exceeded. A check mark in the box indicates that the Product ID is excluded from low stock alerts.
Ordered Qty - The quantity of the Product ID currently on order.
On Layaway - The quantity of the Product ID currently on layaway.
On Order (ECommerce) - The quantity of the product ID currently ordered by an eCommerce customer, but not yet shipped.
For Gifts / Promotions - The quantity of the Product ID that are designated to be given away as gifts or for promotions.
On Hold - The quantity of the Product ID currently on hold.
In Transit - The quantity of the Product ID ordered currently in transit.
Damaged - The quantity of the Product ID that has been damaged.
Lost - The quantity of the Product ID that has been lost.
Stolen - The quantity of the Product ID that has been stolen.
Note On Manual Adjustment - Use this text box to enter any notes about adjustments being made to the product profile. For example, you might need to document an item that has been placed on hold. Click inside the Note on manual adjustment field, record your name/employee number and the reason for the change (e.g. "Employee #036, Item placed on hold by Customer ID tc023483").
At the bottom of the popup, click the Save button or press 'Ctrl' + 'S' on the keyboard.

From the Multi Location Administration main screen, click Inventory.
On the Inventory menu, under the Product section, click Product List.
Search for the product you wish to view.
Click the product on the list of search results. The Product Details view appears.
Do one of the following:
On the Product Details view, click the IDs tab, and then click the Other stores button for the desired Product ID..
On Product ID Details popup, click the Inventory tab, and then click the Other stores button.
The In-stock in Other Stores popup appears listing the stock quantities at other store locations.

In-stock - The quantity of the Product ID currently in inventory at the other store(s).
Ordered - The quantity of the Product ID currently on order at the other store(s).
Minimum - The inventory count for the Product ID at which the product should be re-ordered at the other store(s).
Click the Close button to close the popup.
At the bottom of the popup, click the Close button.