Click the Select Customer button in the header bar of the POS view.
OR
Click the Customer Search button (![]() ) on the Transactions buttons panel.
) on the Transactions buttons panel.
When transacting a sale, you can choose to assign a customer in your PAYD Pro PlusTM customer database to the sale. You assign the customer from the POS view.
NOTE: This procedure is optional. You can choose to assign the customer at any time during the sale, or leave the sale assigned to the Anonymous customer (a default customer profile set up to handle unassigned transactions).
Click the Select Customer button in the header bar of the POS view.
OR
Click the Customer Search button (![]() ) on the Transactions buttons panel.
) on the Transactions buttons panel.
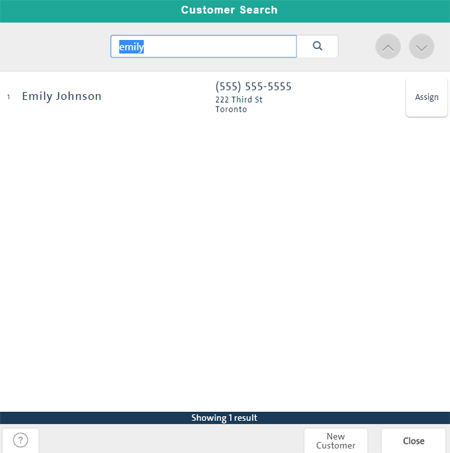
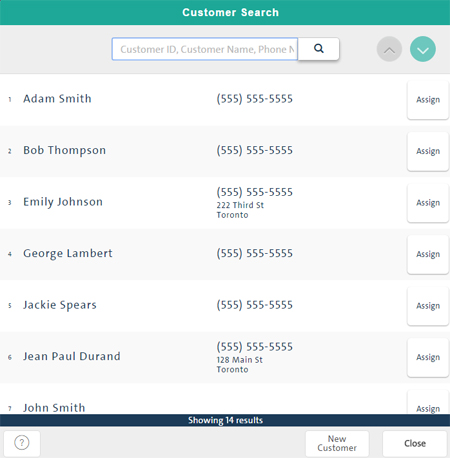
The Customer Search screen appears.
![]()
To search for the customer, enter Customer ID, name or phone number and click the Search button (![]() ).
).
A list of matching customers appears below.
TIP: To display all customers in your database, leave the textbox blank and click the Search button (![]() ).
).
TIP: To view the customer's details, on the results list, click the customer. For more help, see Viewing/Updating Customer Details.
NOTE: If the customer is not in your customer database, you can register the customer at the same time you transact the sale. For more help, see To register the customer at the time of the sale below.
To assign the customer to the sale, click the Assign button beside the customer's name.
The customer is assigned to the sale and the Customer Search screen closes. The assigned customer's name is displayed on the POS view header in place of the Select Customer button. If applicable, sale amounts are recalculated.
At the bottom of the Customer Search screen, click the New Customer button.
A blank Customer Details popup appears.
![]()
Add the customer. For details, see Adding a New Customer.
Once the new customer profile is saved, click the Assign button.