Add products to the invoice. See Adding Products to a Sale for more information.
Adjust quantities and prices and apply discounts as applicable.
Tap the Shopping Cart button ( ) at the top of the right pane to checkout.
Follow the instructions below to create the invoice to send to the customer.
Assign a customer to the sale:
● Click here for information on assigning an existing customer.
● Click here for information on creating a new customer profile to assign a new customer.
Add products to the invoice. See Adding Products to a Sale for more information.
Adjust quantities and prices and apply discounts as applicable.
Tap the Shopping Cart button ( ) at the top of the right pane to checkout.
The Checkout screen appears.

● If the customer is leaving a deposit:
• Tap the payment method on the right pane that the customer wishes to use to leave a deposit. Refer to the various sections under Payment Processing for instructions on processing the customer’s deposit. When finished processing the deposit, proceed to step 6.
OR
● If the customer is not leaving a deposit:
• Proceed to step 6.
On the right pane of the Checkout screen, tap Invoice.
The Invoice popup appears.

If the customer is picking up their purchase, leave Pickup highlighted.
● If the customer is having their purchased items shipped to them, tap Shipping.
Tap the date that appears (by default it display's tomorrow's date).
The Select date popup appears.

Use the date selector to choose the month, day, and year the customer will be picking up or having their items shipped.
● Tap Done at the bottom of the Select date popup.
Set the Balance due date:
Tap the date that appears (by default it display's tomorrow's date).
The Select date popup appears.
Use the date selector to choose the month, day, and year the customer will be picking up or having their items shipped.
Tap Done at the bottom of the Select date popup.
a. If the invoice is going to be scheduled to occur at a specific future date (as opposed to today), set the Scheduled invoice date using the Select date popup described above. If the invoice will not require scheduling, leave this setting alone.
(Optional) Use the Notes field to enter notes about the invoice as applicable. These notes appear on the invoice that is sent to the customer.
b. Tap Next in the top right corner of the Invoice popup.
Review the invoice details, and if satisfied, tap Done in the top right corner of the Invoice popup.
c. 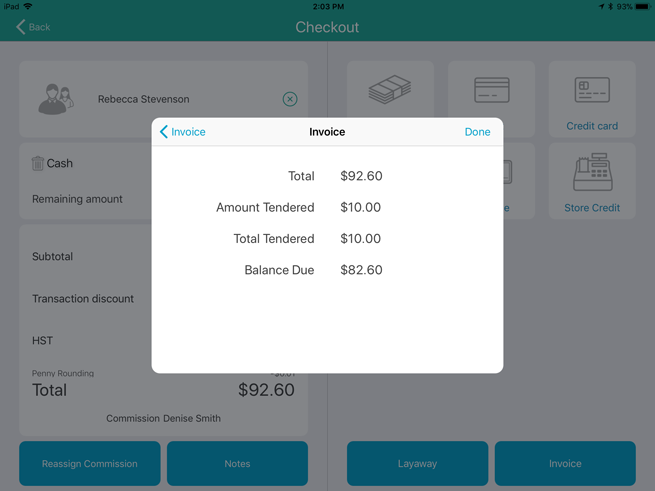
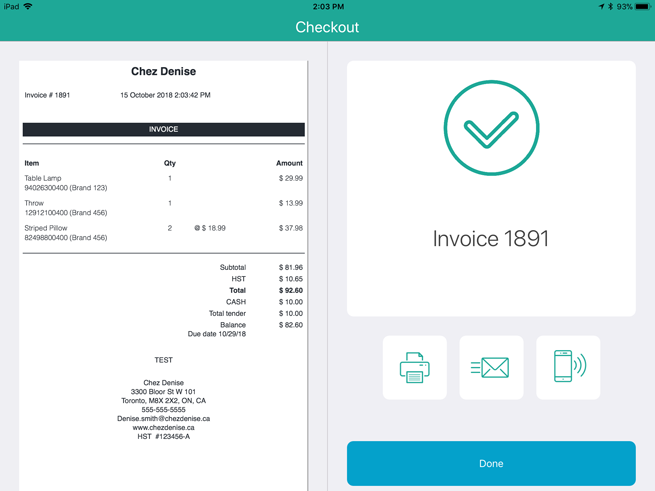
In the Checkout - Invoice screen, select the method by which the customer would like to receive their invoice:
a. Print - Proceed to Printing Invoices.
Email - Proceed to Sending Invoices via Email.
b. SMS text message - Proceed to Sending Invoices via SMS Text.
The Print button ( ) appears if there has been a deposit paid on the invoice by another payment type (like Cash, Debit, or Credit). Follow the steps below to print a copy of the invoice.
Tap the Print button ().
The Select option popup appears.
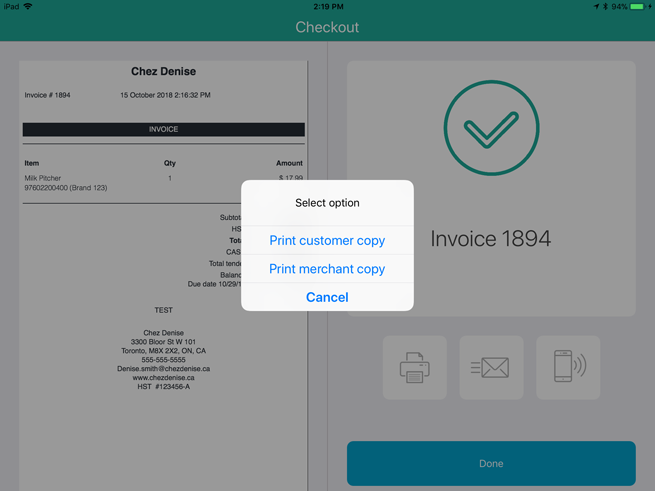
Tap the copy you'd like to print:
c. To print a customer copy of the invoice, tap Print customer copy. Proceed to step 3.
10. To print a merchant copy of the invoice, tap Print merchant copy. Proceed to step 3.
11. To cancel the operation without printing and return to the Checkout screen, tap Cancel. Proceed to step 4.
The receipt prints and returns to the Checkout screen.
Tap Done.
The transaction completes and returns to the Sale screen.
If the customer wishes to receive their invoice via email, they will receive an email from your store with a link to a secure hosted pay page. Follow the steps below to send the invoice via email.
In the Checkout - Invoice screen, tap the Email Invoice ( ) button.
A popup appears.
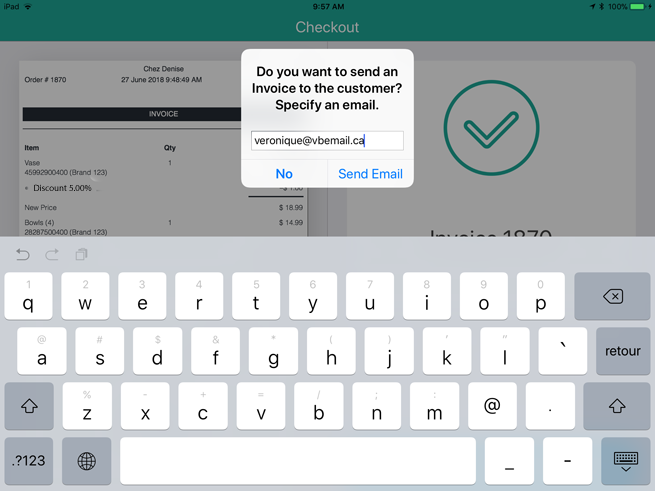
NOTE: The customer's email address may already be populating the popup. If so, confirm the address, tap Send Email, and proceed to step 3.
Enter the customer's desired email address and tap Send Email.
The email sends and a popup appears informing you that the email was sent successfully.
Tap OK on the confirmation popup.
Tap Done at the bottom of the right pane,
If the customer wishes to receive their invoice via SMS text message, they will receive a text from your store with a link to a secure hosted pay page. Follow the steps below to send the invoice via SMS text.
In the Checkout - Invoice screen, tap the Text Invoice ( ) button.
A popup appears.
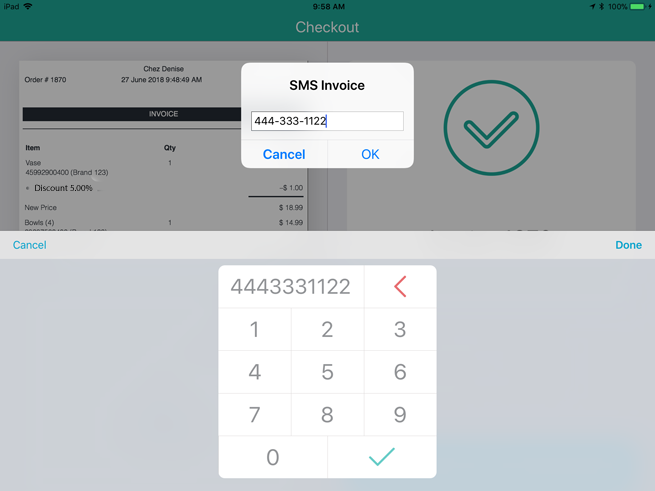
NOTE: The customer's mobile phone number may already be populating the SMS Invoice popup. If so, confirm the number, tap the checkmark button ( ), and proceed to step 3.
Enter the customer's desired mobile phone number and tap the checkmark button ().
The number appears in the Text Receipt popup.
Tap OK on the Text Receipt popup.
The message sends and a popup appears informing you that it was sent successfully.
Tap OK on the confirmation popup.
Tap Done at the bottom of the right pane.
Editing an Invoice Before Sending