 ) at the top of the right pane to checkout.
Follow the instructions below to create a layaway.
NOTE: A customer must be assigned to the sale in order to process it as a layaway. If the customer is not currently in your customer database, they will need to be added before the layaway can be processed.
2. Add products to the sale.
3. Adjust quantities and prices and apply discounts as applicable.
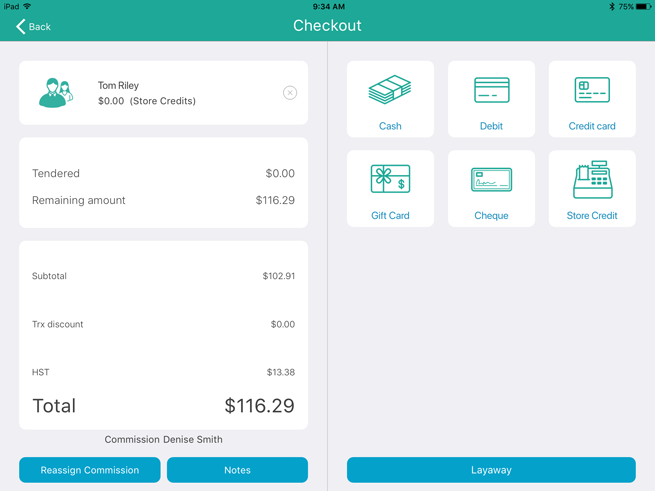
4. Tap the Shopping Cart button ( ) at the top of the right pane to checkout.
The Checkout screen appears with the payment types on the right pane.

5. Determine if the customer is putting down a deposit on their item:
● If the customer is leaving a deposit:
Tap the payment method the customer wishes to use to leave a deposit. See Taking Layaway Deposits for more information.
OR
● If the customer is not leaving a deposit:
Proceed to step 6.
6. Tap the Layaway button at the bottom of the right pane.
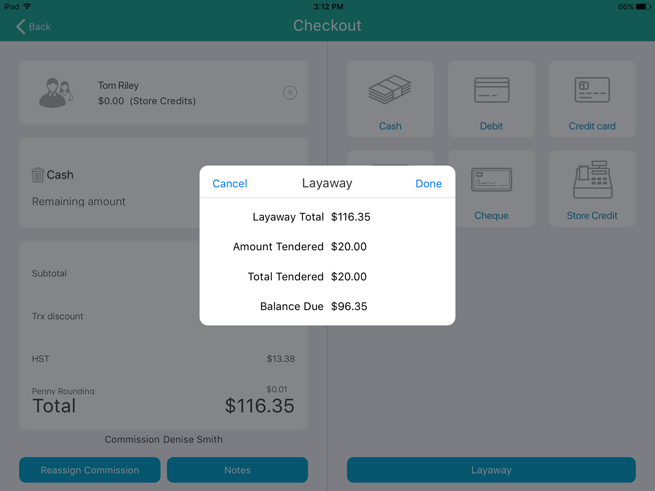
The Layaway popup appears.

7. Review the information in the popup.
● If the information in the Layaway popup is accurate, tap Done and proceed to step 8.
● If the information in the Layaway popup is inaccurate, tap Cancel and return to step 6.
8. Process the receipts.
Tap Done to complete the transaction.
NOTE: Once a layaway is created, it cannot be modified to change items, pricing, quantities or commissioned staff. The layaway will need to be refunded or cancelled and then recreated again following the steps above.