Use the Layaway tool in the PAYD Pro PlusTM In-Store Solution to put sale items on layaway. You can access the tool from the Transactions button panel on the POS view.
A layaway is initiated after you finish adding items to the sale (done instead of a regular checkout), at which time the customer can pay an initial deposit (optional). Once the layaway is initiated, the customer can make multiple payments until the layaway is paid in full.
As in the case of regular sales, you can refund layaways and process returns on a layaway's items. Note, however, that these processes differ according to whether a layaway is Pending (i.e., has a remaining balance) or Completed (i.e., has been paid in full).
Once you have initiated a new layaway and processed its initial deposit, you can perform additional layaway tasks such as processing additional payments, viewing/updating details, refunding a layaway, processing a return on a layaway and cancelling a layaway.
NOTE: Before putting items on layaway, refer to Important Notes About Invoices and Layaways especially with regard to the Use Layaways, Optional Layaway Period and Layaway Policy configuration settings.
NOTE: The Layaway tool must be enabled in the Configuration - Settings screen before it can be used.
NOTE: Layaways can now be processed in the PAYD Pro Plus Mobile App. Click here for more information.
Process the transaction: assign a customer, add products to the bill, adjust quantities or prices, apply discounts (if applicable).
NOTE: Ensure that the customer's profile includes name, phone number and address information. If this information is missing, you can add it to the profile at the time of assigning the customer. For details, see Viewing/Updating Customer Details.
On the Transactions button panel, click Layaway.
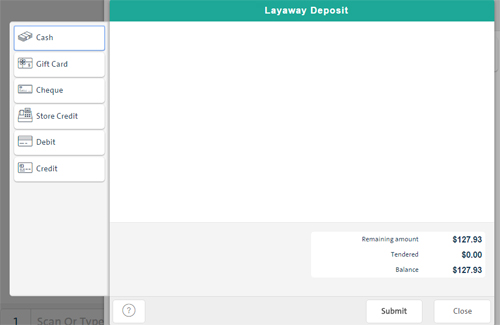
The Layaway Deposit popup appears
Process the initial deposit as shown below.
On the Layaway Deposit popup, click the button that corresponds to the deposit's payment type. Valid payment types are cash, gift card, cheque, store credit, debit and credit.
The appropriate payment type fields appear on the popup.
Process the payment as you would on a regular sale.
Choose how you want to proceed:
To submit the deposit:
Click Submit or press the Enter key on the keyboard.
OR
To collect more deposit money using another payment method:
Click another payment method on the left side of the Layaway Deposit popup and repeat step 2.
Merchant and Customer copies of the layaway are printed showing the amount and tender of the deposit (if any), and the balance owing.
NOTE: To save and print the layaway with no initial deposit made, click the No Deposit button at the bottom of the popup. To cancel initiation of the layaway, click the Close button.
Search for the layaway as you would any other transaction. For details, see Searching Transactions.
Matching layaways appear on the screen.
![]()
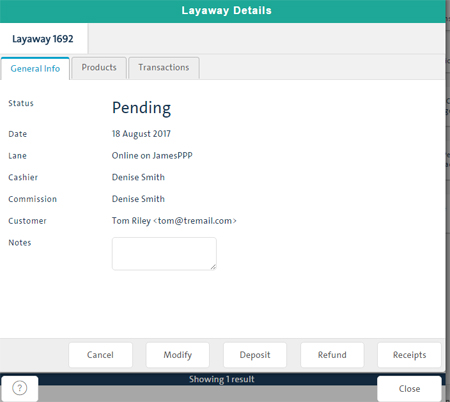
Click the layaway on the results list to display details in the Layaway Details popup.
Click the tabs to display details as needed:
To view the layaway's basic details (Status, Customer, Notes, etc.), click the General Info tab.
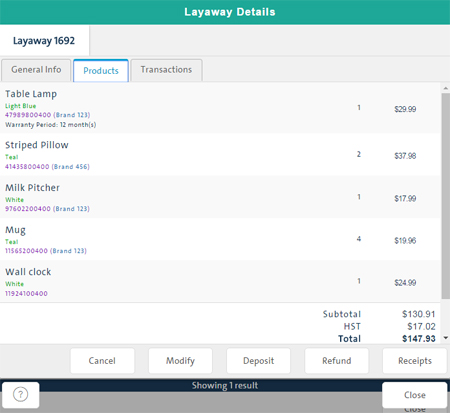
To view the products and sale amounts associated with the layaway, click the Products tab.
To view the transactions associated with the layaway, click the Transactions tab.
![]()
To add notes to the layaway, enter them in the Notes textbox in the General Info tab.
To reprint the layaway, click Receipts at the bottom of the popup. For details, see Printing Customer/Merchant Receipts.
To close the popup, save any changes and return to the Search All Sales and Refunds screen, click Close at the bottom of the popup.
NOTE: You can also use the Layaway Details popup to perform the additional tasks documented in this topic.
NOTE: Only Pending layaways can be refunded. To reverse a Completed layaway, you must process a return (see below). Refunding a layaway for the full amount paid to-date is the same as cancelling it (see below).
In the POS view, search for the layaway as you would any other transaction. For details, see Searching Transactions.
Matching layaways appear on the screen.
Click the Refund button for the layaway you want to refund.
The Refund popup appears prompting you to select a payment type.
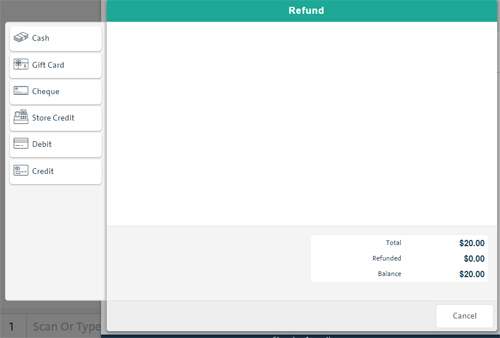
Click the button corresponding to the payment type selected for the refund and complete the refund as you would normally.
For details, see Processing a Cash Refund, Processing a Gift Card Refund, Processing a Debit Refund, Processing a Credit Card Refund and Processing a Store Credit Refund.
NOTE: Returns can be processed on Completed layaways only. As with regular returns, you can choose to refund or exchange the item(s).
In the POS view, search for the layaway as you would any other transaction. For details, see Searching Transactions.
Matching layaways appear on the screen.
Click the Return button for the layaway you want to process a return on.
The Select Products for Return or Exchange screen appears.
Process the return as you would normally. For details, see Transacting a Return: Quickview.
NOTE: Only Pending layaways can be cancelled.
In the POS view, search for the layaway as you would any other transaction. For details, see Searching Transactions.
Matching layaways appear on the screen.
Click the Cancel button for the layaway you want to cancel.
When prompted for confirmation, click Yes.
The Refund Transaction popup appears prompting you to select a payment type.
Click the button corresponding to the payment type selected for the refund and complete the refund as you would normally.
For details, see Processing a Cash Refund, Processing a Gift Card Refund, Processing a Debit Refund, Processing a Credit Card Refund and Processing a Store Credit Refund.
Important Notes About Invoices and Layaways
Configuring Other Merchant Settings
Layaways Overview (Mobile)